Blog

  • 8 Less-Crowded European Destinations to Visit in 2026

    Europe does not have a shortage of beautiful places. The real challenge is choosing somewhere that still feels enjoyable once you arrive. A famous old town can look perfect online and feel exhausting when every street is packed. In 2026, more travelers are looking beyond the most saturated capitals and resort islands toward smaller regions that offer strong food, nature and culture without the same pressure.

    This guide is for travelers who still want a memorable European trip but do not need to stand in the busiest square to prove they were there. The eight destinations below are not “secret” places. They have tourism infrastructure, places to stay and real reasons to visit. What they often offer is a better balance between local life and visitor demand.

    For broader regional planning, the European Travel Commission publishes tourism research and market information. Always check the official tourism site for your chosen country before booking transport, events or seasonal activities.

    Why Choose a Secondary Destination in Europe?

    There are three practical reasons. First, your days become easier. You spend less time in queues and more time walking, eating and exploring. Second, accommodation can offer better value outside headline destinations. Third, spreading travel demand can reduce pressure on places that struggle with crowding.

    This does not mean you must avoid Paris, Rome or Barcelona forever. A smart trip can combine one major city with one smaller region. For example, spend three days in Rome and four days in Umbria. Visit Lisbon, then continue into Alentejo. Fly into Athens, then choose a quieter island instead of automatically following the busiest route.

    What “less crowded” really means

    No destination is empty all year. Beach towns still fill in peak summer, festivals bring short demand spikes, and good weather attracts weekend visitors. The goal is not isolation. It is finding places where tourism is less concentrated and where you can still experience local streets, restaurants and landscapes without structuring every day around reservations.

    1. Alonnisos, Greece: Best for Quiet Island Time and Marine Nature

    Alonnisos sits in the Northern Sporades and offers a different rhythm from Greece’s busiest island names. Pine-covered landscapes, small coves and access to the National Marine Park make it a strong option for travelers who want water, walking and a slower village atmosphere.

    The official Visit Greece site is the right starting point for current transport and destination information. Ferry schedules can change by season, so do not build a same-day international flight connection around an optimistic transfer.

    How to plan it

    Give the island at least four nights. One day can be for a boat trip, one for beaches, one for old Alonnisos and walking, and one as a flexible weather day. If you only stay two nights, transport can take up too much of the visit.

    Best for: couples, solo travelers, swimmers, hikers and people who prefer simple evenings to club nightlife.

    Skip it if: your priority is luxury shopping, large nightlife districts or a packed schedule of major attractions.

    2. Liepāja, Latvia: Best for Baltic Beaches, Music and Architecture

    Liepāja is a coastal city with a long beach, distinctive architecture and a creative identity. It works well for travelers who want an urban base without a huge-city pace. It is also useful as part of a Baltic trip, especially if you want to break up a route that would otherwise focus only on capital cities.

    Use the official Latvia Travel portal for current regional information. Weather on the Baltic coast can change quickly, so pack for wind and rain even in a generally mild period.

    A two-day plan that does not feel rushed

    On day one, explore the center, market areas and seaside. Leave time to sit on the beach rather than treating it as another photo stop. On day two, focus on Karosta, local history and a slower evening around the city.

    Liepāja is especially good for travelers who enjoy seeing how a city actually lives. You are not moving between world-famous monuments every hour, and that is the point.

    3. Dalsland, Sweden: Best for Lakes, Canoeing and Slow Nature

    Dalsland is a nature-first destination built around lakes, forest and outdoor activity. It suits travelers who want to paddle, hike, cycle or stay in a cabin rather than follow a city sightseeing checklist.

    For trip planning, Visit Sweden provides national travel guidance and regional inspiration. In rural areas, transport frequency matters. If you are not driving, check each connection before booking accommodation.

    Choose one base instead of changing hotels

    Nature trips become tiring when you move every night. Pick a base close to the activity you care about most. If canoeing is the priority, stay near an outfitter or accessible lake. If hiking is more important, choose a trail-friendly area and build in a bad-weather alternative.

    Real-world scenario: A family with four nights can spend one day paddling, one day hiking, one day driving or cycling between small communities, and still have a quiet day for a picnic and short walk. That often feels more restorative than four days of city queues.

    4. Vipava Valley, Slovenia: Best for Wine, Villages and Road Trips

    Slovenia is compact, which makes it easy to combine famous places with a quieter region. The Vipava Valley offers vineyards, small towns, cycling and food experiences without requiring a long domestic flight or complex transfer.

    Start with the official I feel Slovenia tourism site for transport, events and regional planning.

    How to make the valley work without overplanning

    Choose two tasting or food experiences in advance, not six. Leave the rest of the day for driving, viewpoints and village stops. If you plan to taste wine, use a designated driver, taxi or guided experience. Do not assume you can casually drive between wineries after drinking.

    Two to three nights is enough for a first visit. It also combines well with Ljubljana, the coast or the Julian Alps.

    5. Alentejo, Portugal: Best for Food, Wine and Open Landscapes

    Many Portugal itineraries concentrate on Lisbon, Porto and the Algarve. Alentejo gives you a different experience: whitewashed towns, vineyards, cork landscapes, long meals and a slower road-trip pace.

    The official Visit Portugal site can help with current regional information and seasonal events.

    Where to focus

    Évora is the easiest cultural anchor for a first visit. From there, add smaller towns or rural stays based on your interests. If you want coastline, southwestern Alentejo has beaches and walking routes, but distances are larger than they look on a map.

    Practical tip: Do not plan lunch as a 30-minute stop. In food-focused regions, a relaxed meal is part of the travel experience. Build fewer attractions into the day and let meals take their natural time.

    6. Asturias, Spain: Best for Green Landscapes, Seafood and Mountain-to-Coast Variety

    Travelers who picture Spain only as hot, dry and crowded in summer often overlook the north. Asturias offers a greener landscape, dramatic coast, mountain access and strong local food culture.

    Use the official Spain.info portal for current travel information and destination planning.

    Why Asturias works for an active trip

    You can spend one day walking along the coast, another in the mountains, and another eating through a small city or village area. That variety makes a five- to seven-night stay easy to fill without repetitive sightseeing.

    Oviedo and Gijón are practical urban bases. A rental car gives you more freedom for beaches and mountain areas, but do not underestimate narrow rural roads or parking in small settlements.

    7. Umbria, Italy: Best for Hill Towns Without a Checklist Mentality

    Umbria sits in central Italy and offers medieval towns, countryside, food and wine without the same international attention as neighboring Tuscany. Perugia, Assisi, Spello, Orvieto and smaller towns can form a flexible route.

    The national Italia.it portal is a useful official source for regional ideas and current visitor information.

    Train trip or road trip?

    If you focus on larger towns, rail can work. If your priority is countryside accommodation, wineries and smaller hill towns, driving gives you more control. A good compromise is to spend a few nights in a rail-accessible base and rent a car only for the rural section.

    Umbria suits travelers who enjoy mornings in town, long lunches and afternoons that do not need a major ticketed attraction.

    8. Saxon Switzerland, Germany: Best for Hiking Near a Major City

    Saxon Switzerland National Park gives you sandstone formations, river scenery and hiking access near Dresden. It is a useful choice when you want to add nature to a Central European city trip without flying to another country.

    Check the official Germany Travel site and local park information before hiking. Trail access can change because of weather, maintenance or conservation needs.

    Build the day around your fitness level

    Do not pick a route only because it has the best viewpoint on social media. Check distance, elevation, surfaces and return transport. Carry water and a light rain layer. If you are traveling in shoulder season, daylight becomes an important planning limit.

    How to Choose the Right Destination for Your Trip

    Use your actual travel style, not a generic “best places” ranking.

    • For beaches and swimming: Alonnisos.
    • For a compact cultural city: Liepāja.
    • For lakes and outdoor activity: Dalsland.
    • For wine and village driving: Vipava Valley.
    • For relaxed food and countryside: Alentejo.
    • For mountains plus coast: Asturias.
    • For Italian hill towns: Umbria.
    • For hiking near a city route: Saxon Switzerland.

    If you are traveling for only one week, choose one region and one nearby city. A seven-day trip with four flights is rarely relaxing.

    When to Travel for Better Value and Fewer Crowds

    Shoulder season is useful, but it is not a magic rule. April, May, late September and October can be excellent in many parts of Europe, yet local weather varies widely. A Greek island and a Swedish lake region do not share the same ideal month.

    Check three things before booking: seasonal transport, average weather and whether the activities you care about are operating. A low hotel price is not good value if ferries are limited or the experience you wanted is closed.

    Travel midweek when possible

    Small destinations can feel completely different on a Saturday compared with a Tuesday. If your schedule is flexible, move city stays to weekends and nature or village stays to weekdays when that pattern improves availability.

    How to Keep a Quieter Trip Affordable

    Secondary destinations are not always cheap. Rural car rental, limited transport and boutique accommodation can raise costs. Compare the whole daily budget rather than just hotel rates.

    A city with a €70 hotel but expensive taxis may cost more than a €100 hotel near reliable public transport. Likewise, a countryside stay with a kitchen can reduce restaurant spending if you are staying several nights.

    Use one paid experience as the anchor

    Instead of booking tours every day, choose one memorable paid activity: a guided hike, cooking class, wine tasting, boat trip or cultural visit. Build the rest of the day around walks, markets, beaches and self-guided exploration.

    Responsible Travel Without Making the Trip Complicated

    Responsible travel can be practical. Stay several nights instead of treating a place as a two-hour stop. Spend money at local businesses. Follow trail and beach rules. Use public transport when it works. Do not enter private property for a photo. Keep noise low in residential areas.

    Most importantly, remember that “less crowded” does not mean a destination exists for visitors without limits. Smaller places can feel tourism pressure more quickly because their infrastructure is smaller.

    A Sample 12-Day Europe Route Using Secondary Destinations

    One realistic structure is:

    • Days 1–3: Lisbon.
    • Days 4–7: Alentejo, based in or near Évora.
    • Day 8: Travel day.
    • Days 9–12: Asturias or another region reached by a sensible direct connection.

    But do not copy this route if flights or trains make it inefficient from your home airport. The principle matters more than the exact map: pair one easy gateway with one deeper regional stay.

    Common Mistakes When Chasing “Hidden Gems”

    Assuming hidden means undiscovered

    If a place has hotels, tours and a tourism website, other travelers know about it. Go because it suits you, not because you expect to be alone.

    Ignoring transport

    A beautiful village can be a poor choice if reaching it requires three connections and you have only five days.

    Visiting too briefly

    Secondary destinations become rewarding when you slow down. One rushed afternoon may make a great place feel empty rather than peaceful.

    Booking the cheapest season without checking closures

    Low season can mean fewer restaurants, limited ferries or shorter opening hours. Verify before you pay for non-refundable bookings.

    Final Takeaway

    The best less-crowded European destination for 2026 is not the place with the lowest visitor count. It is the place where your interests, transport, season and budget line up. Alonnisos works for island nature. Dalsland is built for slow outdoor days. Asturias combines coast and mountains. Umbria rewards travelers who want Italy without racing between headline sights.

    Choose one region, stay long enough to understand its rhythm, and use official tourism sources for current logistics. You can still include Europe’s famous cities. Just give the smaller places enough time to become more than a side trip. That is usually where the trip starts to feel personal rather than prepackaged.
  • Japan in Autumn 2026: 9 Best Places to Visit Beyond the Usual Tokyo Trip

    Japan in autumn is easy to romanticize: red maple leaves around a temple, crisp mornings, seasonal food, mountain views and long walks through old neighborhoods. The hard part is turning that picture into a trip that actually works. In 2026, demand remains strong, major cities can feel busy, and autumn weather arrives at different times depending on where you go. A good plan is not simply “visit Kyoto in November.” It is choosing the right region for your dates, building a realistic route, and keeping enough flexibility for weather and crowds.

    This guide focuses on nine places that work especially well for an autumn trip, including several options beyond the standard Tokyo-Kyoto-Osaka circuit. It also explains how to choose your dates, how long to stay, when to use trains instead of flights, and how to avoid wasting half your holiday in transit.

    For current seasonal information, check the official Japan National Tourism Organization. For Tokyo-specific autumn updates, the official GO TOKYO autumn guide notes that early September can still feel like summer, while cooler walking weather becomes more reliable later in the season. Weather can shift, so use the Japan Meteorological Agency before and during your trip.

    When Is the Best Time to Visit Japan in Autumn 2026?

    There is no single “best week” for the whole country. Japan stretches a long way north to south, and elevation matters too. Hokkaido and high mountain areas usually cool first. Central cities such as Tokyo and Kyoto turn later. Southern regions stay warmer longer.

    If your dates are fixed, choose the destination that matches the season rather than forcing your trip around one famous photo spot. September is better for Hokkaido, alpine landscapes and cities with indoor options. October is a strong all-round month for northern and central Japan. November is usually better for classic maple color in many lower-elevation areas around Tokyo and Kyoto.

    A simple date strategy

    For an eight- to ten-day holiday, choose one main region and one contrast. For example, combine Tokyo with Nikko, or Kyoto with Takayama and Kanazawa. For two weeks, you can add a second major region without turning the trip into a race.

    Avoid booking every hour. Autumn is popular and weather-sensitive. Leave at least one half-day open so you can move an outdoor activity to a clearer period.

    1. Tokyo: Best for First-Time Visitors Who Want Variety

    Tokyo deserves a place on an autumn itinerary even if your goal is to go beyond the obvious. The city works well because it gives you outdoor color, food, museums, shopping and easy rail connections in one base. In September, heat and humidity may still be high. By mid to late autumn, parks and gardens become much more comfortable for long walks.

    Instead of trying to “see Tokyo” in two days, organize each day by area. Pair Meiji Jingu and Harajuku. Combine Asakusa with Ueno. Keep Shibuya and Daikanyama together. This cuts transport time and makes the city feel less overwhelming.

    Autumn experiences worth planning

    Rikugien and Koishikawa Korakuen are strong choices for traditional garden scenery. A walk around the outer gardens of the Imperial Palace gives you open space in the center. Mount Takao is an easy day trip when the city weather is clear, but it can become crowded on peak weekends.

    Practical tip: Start popular outdoor places early, then use the busiest midday hours for lunch, museums or shopping. Tokyo is easier when you alternate high-energy sightseeing with slower blocks.

    2. Nikko: Best Easy Escape from Tokyo

    Nikko gives you ornate shrines, cedar forest, mountain scenery and access to Lake Chuzenji without requiring a domestic flight. That makes it one of the most efficient add-ons to a Tokyo stay. You can visit in a day, but one night creates a much better experience because you can start before day-trippers arrive.

    The important planning detail is elevation. Lake Chuzenji and higher areas cool earlier than central Nikko. If foliage is a priority, check current conditions rather than relying on a date from an old blog post.

    How to spend 24 hours

    Arrive in the morning, leave luggage at your hotel, and explore the shrine area before lunch. In the afternoon, move toward the lake if weather and transport timing are good. Stay overnight, then take a slower morning walk before returning to Tokyo.

    This is a good example of why one-night side trips can be more rewarding than another long Tokyo day. You get a clear change of pace without adding a complicated route.

    3. Kyoto: Best for Temples, Gardens and Evening Walks

    Kyoto is famous for autumn color, so it is also one of the places where poor planning causes the most frustration. The solution is not to skip Kyoto. It is to stop treating every famous temple as mandatory.

    Pick two or three anchor experiences per day. A morning in Arashiyama can be followed by a quieter neighborhood rather than another headline attraction. In eastern Kyoto, walk between nearby temples instead of repeatedly crossing the city.

    How to reduce crowd stress

    Stay within walking distance of a train or subway station. Visit one high-demand site at opening time. Use late afternoon for neighborhoods, canals and smaller temples. If a location is clearly packed, leave. Kyoto has enough cultural depth that a less famous garden often gives you a better memory than a famous view experienced shoulder-to-shoulder.

    Also remember that buses can be slow when visitor numbers are high. Rail plus walking is often more predictable.

    4. Kanazawa: Best for Culture Without Kyoto’s Scale

    Kanazawa is a strong choice for travelers who want traditional districts, gardens, crafts and excellent seafood in a city that feels more manageable. Kenrokuen is the headline garden, but the real advantage is how easily you can combine it with the castle area, tea districts and markets.

    Kanazawa works particularly well as part of a Tokyo-Kanazawa-Takayama-Kyoto route. You get a different side of Japan without major backtracking.

    A practical one-and-a-half-day plan

    Use your arrival afternoon for Omicho Market and the central districts. Spend the next morning at Kenrokuen and the castle area, then choose one cultural neighborhood in the afternoon. Do not try to fit every preserved district into the same day; the city is better at walking speed.

    5. Takayama: Best for Mountain Atmosphere and a Slower Pace

    Takayama gives you a compact old town, mountain food traditions and access to rural scenery. It suits travelers who are tired of big-city navigation and want a place where the day can be built around walking rather than transport.

    Because temperatures can fall quickly, pack layers even if your previous stop was warm. A light insulated layer is more useful than carrying one very heavy coat for the whole trip.

    Who should stay two nights?

    Stay two nights if you want a day trip to Shirakawa-go or if you simply want a rest day between fast-moving city stops. Stay one night if Takayama is mainly a scenic break on the route between Kanazawa and Kyoto.

    6. Fuji Five Lakes: Best for Clear-Weather Flexibility

    Mount Fuji is not a sightseeing attraction you can schedule with certainty. Clouds can hide it completely. That is why the best approach is to make the Fuji Five Lakes area part of a flexible section of your trip rather than the single reason for a long detour.

    Check the forecast the evening before. If visibility looks poor and your bookings allow it, switch the day with a city activity. If the weather is clear, start early because morning visibility can be better.

    What to do besides viewing Mount Fuji

    Lake walks, cycling, museums, ropeways and hot spring stays give the area value even if the mountain disappears behind cloud. A ryokan night can also break up a Tokyo-Kyoto itinerary in a way that feels very different from another city hotel.

    7. Hokkaido: Best for Early Autumn and Nature

    If you are traveling in September or early October, Hokkaido can make more sense than chasing autumn color in warmer central Japan. Sapporo gives you a convenient urban base, while national parks and rural areas deliver the bigger seasonal change.

    Hokkaido is large. Do not assume you can see Sapporo, Furano, Biei, Hakodate and an eastern national park in a few days. Pick one sub-region and travel well.

    Rail or rental car?

    Use rail for a city-focused trip. Consider a rental car when your priority is rural viewpoints, small towns and parks that have limited public transport. Build extra time into driving days because weather and daylight affect autumn road trips.

    8. Hiroshima and Miyajima: Best for History Plus Island Scenery

    Hiroshima adds a different emotional and cultural dimension to a Japan itinerary. The Peace Memorial Park and museum deserve unhurried time. Miyajima then gives you water views, shrines, forest paths and a slower rhythm.

    Many visitors make this a rushed day trip from Osaka or Kyoto. A better plan is to stay overnight in Hiroshima or on Miyajima. That lets you experience the island after many day visitors leave.

    Build the day around the tide, not just the train

    The appearance of Itsukushima Shrine changes with the tide. Check tide information and plan your island walk around it. If you hike or use the ropeway, give yourself enough time to return before dark.

    9. Osaka: Best for Food, Nightlife and an Easy Final Stop

    Osaka is often treated as a base for day trips, but it is useful as a destination in its own right. It gives you a more casual city feel after temple-heavy days, plus excellent transport links and a major international airport nearby.

    Use Osaka for evenings, food and one or two focused neighborhoods instead of filling the day with attractions. Dotonbori is lively but touristy. Explore beyond it for neighborhood restaurants, markets and local shopping streets.

    When Osaka fits best

    Osaka works well at the end of a Kansai trip because you can finish with an easier urban day and then travel to Kansai International Airport without returning to Tokyo.

    How to Build a Realistic 10-Day Japan Autumn Itinerary

    Here is a practical route for a first or second trip:

    • Days 1–3: Tokyo, organized by neighborhood.
    • Day 4: Nikko overnight or a full-day trip.
    • Day 5: Travel to Kyoto and keep the evening light.
    • Days 6–7: Kyoto, with one early-start day and one slower district day.
    • Day 8: Osaka food and neighborhoods.
    • Day 9: Hiroshima or a flexible Kansai day.
    • Day 10: Departure or buffer time.

    If you want Kanazawa and Takayama, remove Hiroshima and reduce city time instead of adding more days of constant transit.

    Transport: Do Not Buy a Rail Pass Automatically

    Japan rail passes can be useful, but they are not automatically the cheapest choice. Price your actual long-distance trips first. Point-to-point tickets may cost less for a simple route. Regional passes can also be better when your travel stays within one area.

    Use an IC card for many local trains, subways and buses where accepted. For long-distance trains, reserve seats when your dates overlap weekends, holidays or busy travel periods. If you have large luggage, check baggage rules before arriving at the station.

    Use luggage forwarding when it solves a real problem

    Sending a suitcase from Tokyo to Kyoto can make an overnight stop in Nikko, Kanazawa or a hot-spring town much easier. Pack one small overnight bag and let the larger case skip the side trip. This is one of the simplest ways to make a multi-city Japan trip feel less tiring.

    What to Pack for Japan in Autumn

    Think in layers. A breathable base layer, light sweater or fleece, packable jacket and compact rain protection cover a wider range of conditions than one bulky outfit. Comfortable walking shoes matter more than fashionable travel shoes because a normal sightseeing day can involve many kilometers on foot.

    Bring a small power bank, but follow airline battery rules. Carry a compact reusable bag for purchases. Keep a little cash because some smaller businesses still prefer it, even though cards and digital payments are common in major cities.

    Common Japan Autumn Planning Mistakes

    Trying to visit too many cities

    Every hotel change costs time: checkout, luggage, station navigation, travel, arrival and check-in. Four well-chosen bases usually beat seven rushed ones.

    Assuming foliage dates are fixed

    Seasonal color shifts with temperature and elevation. Use current reports close to your trip.

    Building a schedule with no weather flexibility

    Outdoor viewpoints, mountain trips and Fuji days need backup options. Put museums, shopping and food-focused activities on a flexible list.

    Visiting famous places only at peak hours

    An early start changes the experience. If mornings are difficult for you, choose less famous locations rather than forcing a crowded midday visit.

    Final Takeaway

    The best Japan autumn trip in 2026 is not the one with the most famous stops. It is the one that matches your dates, pace and interests. Use Tokyo as a flexible base, add one or two places that provide a genuine contrast, and resist the urge to cross the country just to collect destinations.

    If your trip is in early autumn, look north or toward higher elevations. If it is later, central Japan gives you more classic foliage options. Check official seasonal updates, keep one flexible half-day, and design each travel day so you still have energy when you arrive. Japan rewards careful planning, but it rewards leaving room for discovery too.

  • Vieques Bioluminescent Bay in 2026: How to Plan a Safe Night Kayak Trip

    Vieques Bioluminescent Bay in 2026: How to Plan a Safe Night Kayak Trip

    Vieques Bioluminescent Bay in 2026: How to Plan a Safe Night Kayak Trip

    Seeing a bioluminescent bay at night sounds simple: get in a kayak, paddle into dark water, and watch it glow. In reality, the quality of the experience depends on moonlight, weather, water conditions, transport, tour timing, and how responsibly the bay is managed. Vieques, Puerto Rico, is one of the best-known places in the world for this kind of night experience, especially Mosquito Bay.
    In 2026, nature-based and water experiences continue to attract travelers who want something more memorable than passive sightseeing. A bioluminescent kayak trip fits that trend, but it should be planned carefully. This guide explains when to go, how to choose a tour, what to pack, how to reach Vieques, and how to protect the ecosystem while still enjoying the glow.

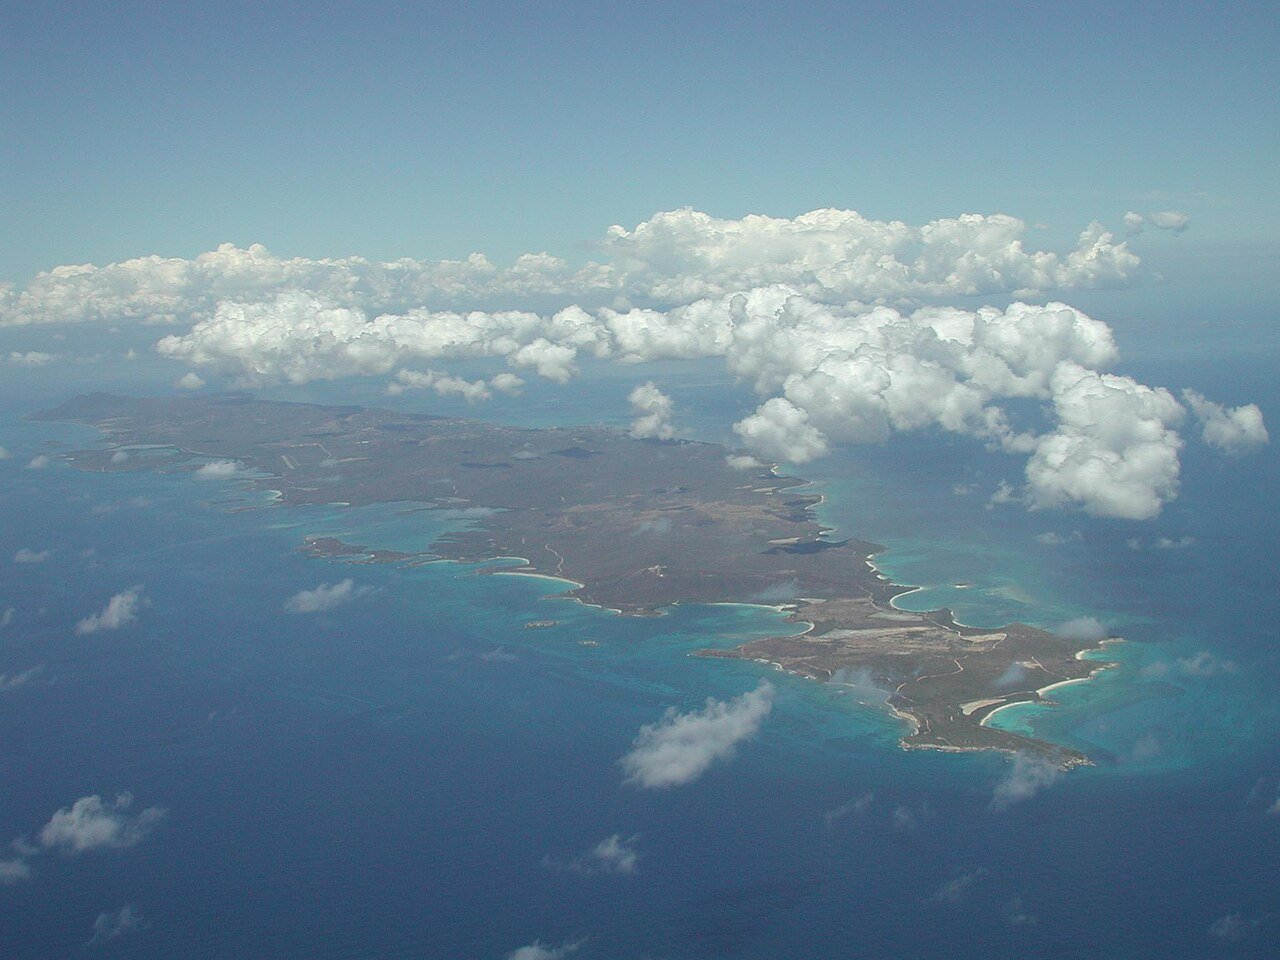
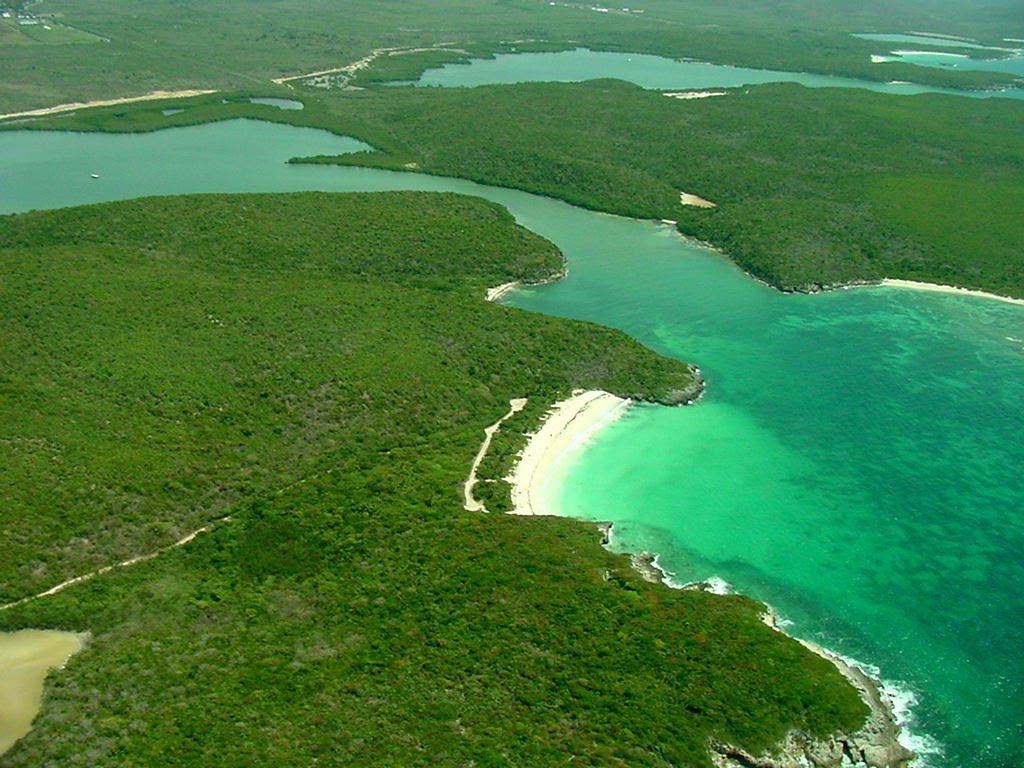
    Aerial view of the bioluminescent bay area in Vieques Puerto Rico
    Aerial view of the Vieques Bio Bay area. USDA and DRNA Puerto Rico, CC BY-SA 4.0.

    For current Puerto Rico travel information, use Discover Puerto Rico. For local conservation and access information, also check official Vieques and tour-operator guidance before your visit.

    What Makes Mosquito Bay Special?

    Bioluminescence happens when microscopic organisms in the water produce light after movement. In Mosquito Bay, paddles, hands, and fish can create brief blue-green flashes in dark conditions.

    The effect is natural, so it cannot be guaranteed with the exact brightness you may see in edited photos or long-exposure images. Water conditions, moonlight, recent rain, wind, and environmental changes all affect what you see.

    Set Realistic Expectations

    Do not arrive expecting the bay to look like neon paint under normal vision. The best nights can be remarkable, but cameras often exaggerate brightness through long exposures or editing.

    When Is the Best Time to Visit?

    The most important factor is darkness. A bright full moon can reduce how clearly you see the glow, while darker moon phases usually improve contrast.

    Check the Moon Phase Before Booking

    Look at the lunar calendar for your travel dates. New-moon periods are often preferred. That does not mean you must cancel a trip because the moon is visible, but darker conditions can improve the experience.

    Weather Matters Too

    Cloud cover can reduce moonlight, but heavy rain, wind, or storms may affect safety and tour operations. Always follow the operator’s decision if a tour is delayed or canceled.

    How Many Nights Should You Stay in Vieques?

    Do not plan the kayak tour on the same evening as a tight arrival connection if you can avoid it. Ferries and flights can be delayed, and you may need time to reach your accommodation and meeting point.

    Best Practical Plan

    Stay at least two nights. Use the first night for the bioluminescent tour and keep the second as a backup in case weather forces a change.

    If the tour runs as planned, the extra day lets you explore beaches, local food, and the island at a slower pace.

    How to Get to Vieques

    Aerial view of Vieques island Puerto Rico for planning transport and an overnight stay
    Vieques island viewed from the air. U.S. Fish and Wildlife Service, public domain.

    Vieques is an island off Puerto Rico’s east coast. Travelers commonly arrive by ferry or small plane.

    Ferry

    Ferry travel can be more affordable, but you should check current schedules, ticket rules, baggage policies, and transport to the terminal.

    Flight

    Small regional flights can save time and may connect from San Juan-area airports. They usually cost more, and baggage rules may be stricter than on major airlines.

    Do Not Build a Zero-Buffer Connection

    If your international flight arrives in Puerto Rico in the afternoon, do not assume you can comfortably reach Vieques and make an evening kayak tour. Delays in baggage, road traffic, ferry schedules, or local transport can ruin the plan.

    How to Choose a Bioluminescent Bay Tour

    Most visitors should join a licensed guided tour rather than trying to access the bay independently. The area is dark, environmentally sensitive, and unfamiliar to first-time visitors.

    Look for These Signs

    • Clear meeting and transport instructions
    • Small or well-managed group sizes
    • Safety briefing before launch
    • Life jackets included
    • Transparent cancellation policy
    • Responsible environmental rules
    • Guides who explain the ecosystem

    A good operator should care about the bay, not only about getting guests on the water quickly.

    Clear Kayak or Standard Kayak?

    Some operators use transparent or clear-bottom kayaks so you can see flashes beneath you. Others use regular kayaks.

    Clear Kayak Advantages

    • Better view below the boat
    • More dramatic visual experience on good nights
    • Useful for first-time visitors

    Possible Trade-Offs

    • Can feel less comfortable depending on design
    • May cost more
    • Scratches or water conditions can reduce clarity

    The operator, guide quality, and timing matter more than the boat material alone.

    What the Tour Usually Feels Like

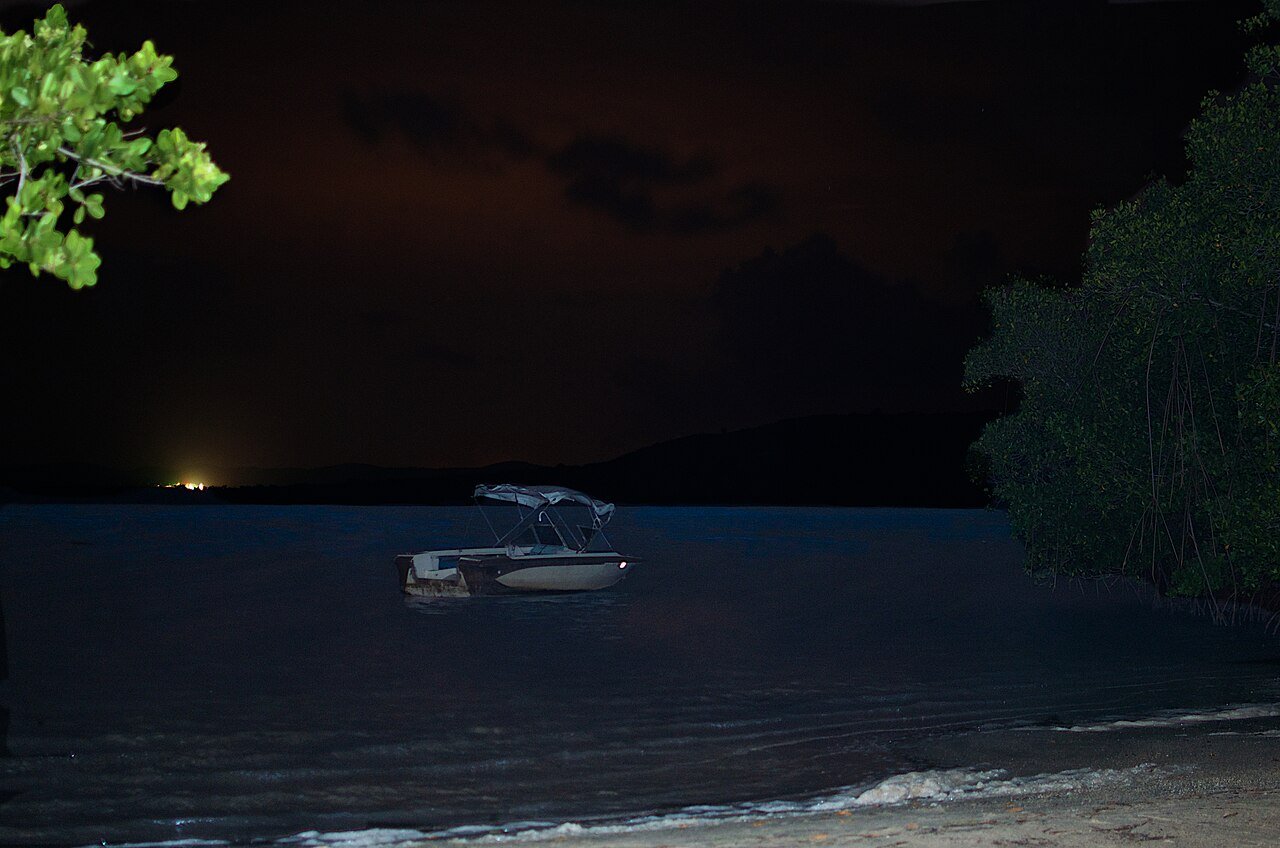
    Dark night view of Mosquito Bay in Vieques for planning a bioluminescent tour
    A dark view of Mosquito Bay in Vieques. Photo: Edgar Torres, CC BY 3.0.

    You will normally meet at a designated point after dark or near sunset. Some tours include transport to the launch area. After a safety briefing, the group enters kayaks and paddles into the bay.

    As the water gets darker, movement can create flashes around the paddle and hull. Guides may explain the organisms, local ecology, and conservation rules.

    Is It Physically Difficult?

    Most tours are designed for normal travelers rather than athletes. Still, you need basic mobility and the ability to sit in a kayak. Wind can make paddling harder.

    If you have limited mobility, back problems, or other concerns, ask the operator about boarding conditions before booking.

    What to Wear

    Dress for getting slightly wet even if the tour description says you should stay dry.

    • Quick-dry shorts or lightweight pants
    • Comfortable shirt
    • Water shoes or secure sandals if recommended
    • Light rain layer when needed
    • Minimal jewelry

    Avoid bringing valuables that you do not need.

    What to Pack

    Bring

    • Small amount of water if allowed
    • Phone in a waterproof case
    • Any required medication
    • Booking confirmation
    • Light layer for after the tour

    Leave at the Hotel

    • Large bags
    • Expensive camera gear unless specifically planned
    • Loose electronics
    • Unnecessary documents

    Why You Should Be Careful With Insect Repellent and Lotions

    Environmental rules may restrict products that can enter the water. Some operators provide specific guidance about insect repellent, sunscreen, perfumes, or lotions.

    Follow the tour company’s instructions. The bay is a sensitive ecosystem, and what you put on your skin can matter.

    Can You Swim in the Bay?

    Do not assume swimming is allowed. Conservation rules can change, and protecting the water quality is important.

    Follow the operator and local regulations. If swimming is prohibited, do not pressure guides or ignore the rule for a photo.

    Photography: What Actually Works?

    Bioluminescence is difficult to photograph with a normal phone. The glow may be visible to your eyes but weak on camera.

    Phone Tips

    • Do not use flash.
    • Keep the phone secure with a waterproof strap or case.
    • Use night mode only if you can hold the phone steady.
    • Do not spend the whole tour looking at the screen.

    Camera Tips

    Low-light photography may require high ISO, wide aperture, and longer exposure. A moving kayak makes this difficult.

    If photography is your main goal, look for an operator that clearly allows and supports camera use. Otherwise, treat photos as a bonus.

    How to Enjoy the Experience Without Ruining It for Others

    Darkness is part of the experience. Bright phone screens and flashlights can reduce everyone’s night vision.

    Good Group Etiquette

    • Keep screen brightness low.
    • Do not use flash.
    • Listen during the guide’s explanation.
    • Avoid splashing other kayaks.
    • Keep a safe distance between boats.
    • Follow instructions quickly if weather changes.

    Safety at Night

    The bay is dark by design, so safety depends on guides, equipment, and group discipline.

    Before Launching

    • Wear the provided life jacket correctly.
    • Tell the guide if you are not a confident swimmer.
    • Ask how to recover if the kayak tips.
    • Secure your phone.
    • Know who your paddling partner is if using a tandem kayak.

    During the Tour

    Stay with the group. Do not paddle away to chase brighter water or a better photo.

    What Happens if It Rains?

    Light rain does not always cancel a tour. Strong wind, lightning, rough water, or unsafe access may.

    Use the operator’s judgment. A canceled nature tour can be disappointing, but safety should come first.

    Why a Backup Night Helps

    If you stay two nights, you have another chance. This is one of the simplest ways to reduce travel stress.

    Best Time of Night

    The best departure depends on sunset, moonrise, moon phase, and operator schedule. Later is not automatically better.

    A well-run tour at the right dark window is more important than chasing the latest available slot.

    How to Pair the Tour With a Day in Vieques

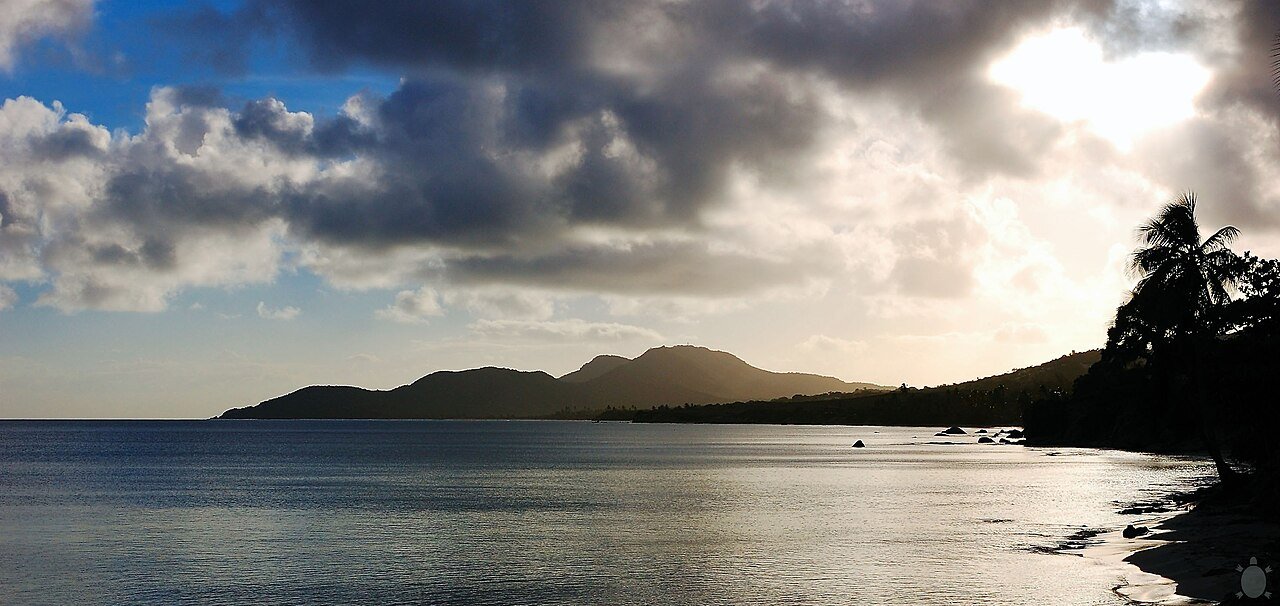
    Sunset over a bay in Vieques Puerto Rico before an evening kayak tour
    Sunset on the bay in Vieques. Photo: Arturo Donate, CC BY 2.0.

    Do not exhaust yourself before the night paddle.

    A Balanced Day

    • Morning: Beach or short island drive
    • Lunch: Casual local meal
    • Afternoon: Hotel rest
    • Early evening: Light dinner
    • Night: Bioluminescent bay tour

    This schedule protects your energy and reduces the chance of arriving late.

    Should You Eat Before the Tour?

    Have a light meal, not a huge dinner. A heavy meal immediately before kayaking may feel uncomfortable.

    Also check whether restaurants near your accommodation stay open late. You may not want to search for dinner after returning from the bay.

    Transport on Vieques After Dark

    Local transport options can be limited compared with San Juan. Confirm how you will get from your hotel to the tour meeting point and back.

    Ask Your Accommodation

    Hotels and guesthouses often know current taxi availability and tour pickup arrangements. Confirm this before sunset, not after the tour ends.

    Where to Stay

    Your best area depends on whether you prioritize beaches, restaurants, or easy tour pickup.

    Choose Based on Logistics

    Do not book the cheapest room without checking transport. A remote stay can be beautiful but inconvenient if you have no rental vehicle or reliable taxi access.

    Ask the tour operator whether they collect from your area before finalizing accommodation.

    Responsible Travel in a Bioluminescent Ecosystem

    Follow Access Rules

    Do not enter restricted areas independently.

    Avoid Touching or Collecting Wildlife

    The bay is not a place to take samples or souvenirs.

    Do Not Dump Anything Into the Water

    Food, drinks, chemicals, and trash can harm a sensitive environment.

    Choose Operators That Educate Guests

    A short explanation of the ecosystem is a good sign that the operator takes conservation seriously.

    Can Children Join?

    Age rules vary by operator. Some tours allow children above a minimum age; others have height, weight, or safety restrictions.

    Ask whether the child must paddle, whether tandem kayaks are used, and what happens if the child becomes uncomfortable in darkness.

    Is the Tour Good for Non-Swimmers?

    Policies vary. Life jackets are standard on reputable tours, but you should tell the operator in advance if you cannot swim.

    Do not hide a safety concern because you are worried about being refused. The operator can tell you whether the activity is appropriate.

    Accessibility Considerations

    Boarding a kayak can require balance, bending, and stepping into shallow or uneven water. Access routes may also be dark or rough.

    If mobility is a concern, contact operators directly and ask specific questions about transfer assistance, seating, launch conditions, and alternative viewing options.

    How Much Should You Budget?

    Your total cost includes more than the kayak ticket. Add:

    • Transport to Vieques
    • Accommodation
    • Local taxi or rental vehicle
    • Tour ticket
    • Meals
    • Optional tips

    A cheaper tour is not always the best value if it has poor transport arrangements or weak safety practices.

    Common Mistakes

    Booking on a Bright Moon Without Checking Conditions

    The bay may still glow, but visibility can be reduced.

    Arriving on Vieques the Same Evening

    One transport delay can make you miss the tour.

    Expecting Phone Photos to Match Your Eyes

    Enjoy the experience first.

    Ignoring Tour Pickup Logistics

    Night transport is not the time to improvise.

    Bringing Too Much Gear

    Keep valuables and bulky bags at your accommodation.

    Breaking Environmental Rules for a Photo

    No image is worth damaging the bay or getting removed from the tour.

    Sample Two-Night Vieques Plan

    Day 1

    Arrive before mid-afternoon. Check in, confirm tour transport, eat an early dinner, and join the bioluminescent bay tour.

    Day 2

    Sleep in, visit a beach, have lunch locally, explore at a relaxed pace, and keep the evening available as a weather backup.

    Day 3

    Depart without rushing into an early international connection.

    Quick Pre-Booking Checklist

    • Check moon phase.
    • Check your arrival time in Vieques.
    • Choose a reputable guided operator.
    • Confirm pickup and return transport.
    • Read age and mobility rules.
    • Understand the weather cancellation policy.
    • Pack light and secure electronics.
    • Keep a second night as backup if possible.

    Final Takeaway

    A Vieques bioluminescent bay trip can be one of the most memorable things you do in Puerto Rico, but the best experience depends on planning more than luck. Choose a dark moon window when possible, stay at least two nights, use a reputable guided tour, and confirm night transport before you leave your accommodation.

    Most importantly, treat Mosquito Bay as a living ecosystem rather than a light show. Follow conservation rules, keep your expectations realistic, and spend less time fighting your camera. When conditions are right, the simple act of moving a paddle through glowing water is enough.

  • Best Hands-On Things to Do in Kyoto in 2026: Crafts, Tea and Cultural Workshops

    Best Hands-On Things to Do in Kyoto in 2026: Crafts, Tea and Cultural Workshops

    Best Hands-On Things to Do in Kyoto in 2026: Crafts, Tea and Cultural Workshops

    Kyoto has no shortage of famous temples and photogenic streets, but one of the best ways to understand the city in 2026 is to do something with your hands. Craft classes, tea experiences, cooking lessons, calligraphy, incense workshops, and traditional art sessions give you a different kind of memory from another sightseeing stop.

    This matters because travel is shifting toward participation. Travelers increasingly want to learn a skill, meet local experts, and understand how an object or tradition is made. Kyoto is especially strong for this because many crafts and cultural practices are still part of living local industries.

    This guide explains which hands-on activities are worth considering, how to choose a credible workshop, how much time to allow, what etiquette matters, and how to fit these experiences into a normal Kyoto itinerary without losing half your day in transit.

    For current visitor information and responsible tourism guidance, use the Kyoto City Official Travel Guide.

    Why Choose a Workshop Instead of Another Attraction?

    Kyoto can become overwhelming if every day is built around temples, shrines, and crowded heritage streets. A workshop slows the pace. You spend one or two hours focused on a process instead of moving from landmark to landmark.

    It also gives you a natural way to ask questions. A skilled instructor can explain why a material is used, how a technique changed over time, and what role the craft has today.

    Good Workshops Create Context

    The best experience is not only “make a souvenir.” It should help you understand the tradition behind the item or practice.

    1. Kyo-Yuzen Dyeing Workshop

    Kyo-yuzen is a traditional Kyoto textile-dyeing technique associated with kimono and decorative fabrics. Beginner workshops often simplify the process so visitors can work with stencils, dyes, or smaller items.

    Why It Is Worth Doing

    You learn how much planning sits behind a pattern that may look effortless when finished. It also gives you a useful introduction to Kyoto’s textile history.

    What You Might Make

    • Handkerchief
    • Small cloth panel
    • Bag
    • Decorative fabric item

    The exact product depends on the studio, so check before booking.

    2. Kiyomizu-yaki or Kyoto Pottery Experience

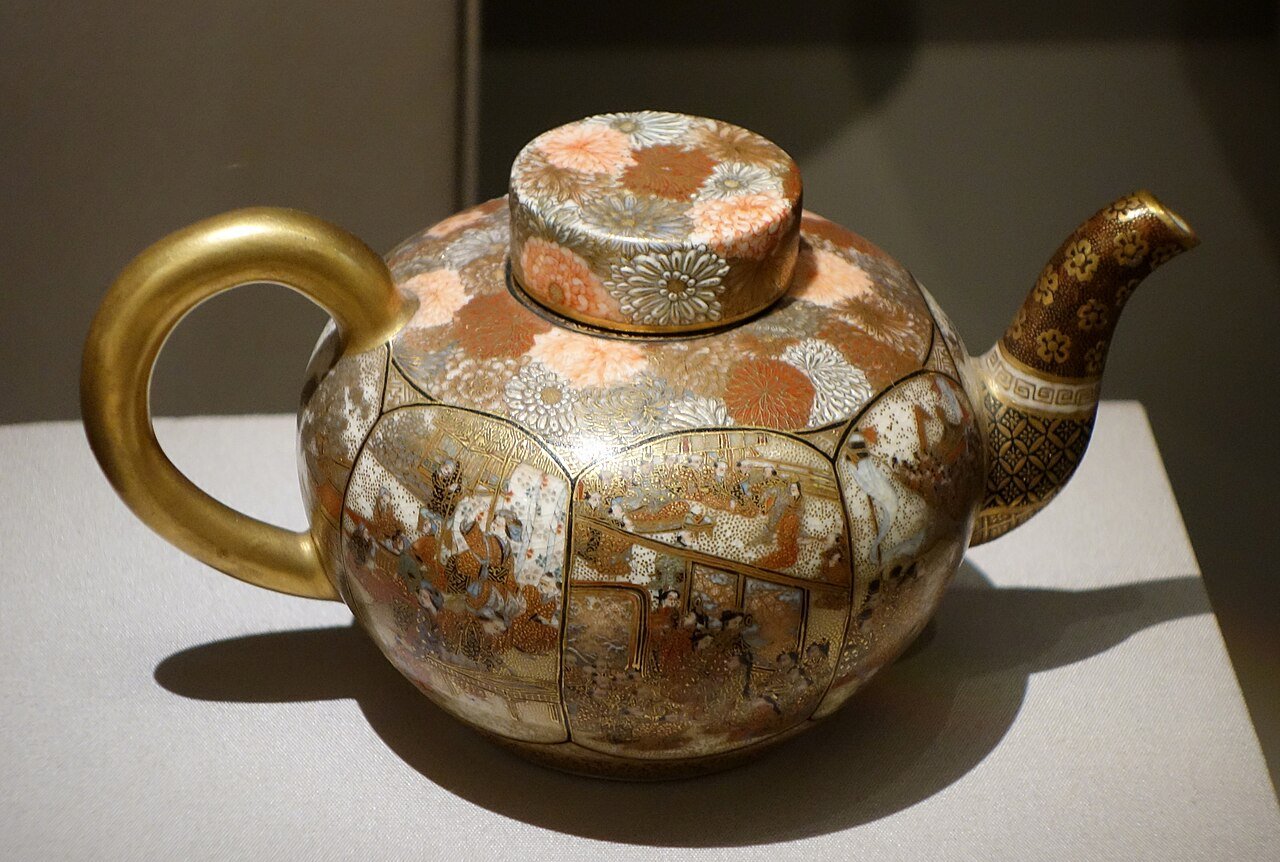
    Decorative Kyoto earthenware teapot representing the city ceramic tradition
    Kyoto earthenware from the Seikozan workshop. Photo: Daderot, CC0.

    Kyoto has a long ceramics tradition. Pottery classes can range from painting a pre-made piece to shaping clay by hand.

    Choose the Format Carefully

    If your trip is short, ask whether the finished item can be taken the same day. Pieces that require firing may need to be shipped later. International shipping can add cost.

    Who Will Enjoy It?

    This works well for couples, families with older children, and solo travelers. You do not need artistic experience. A good instructor should make the process accessible to beginners.

    3. Tea Ceremony Experience

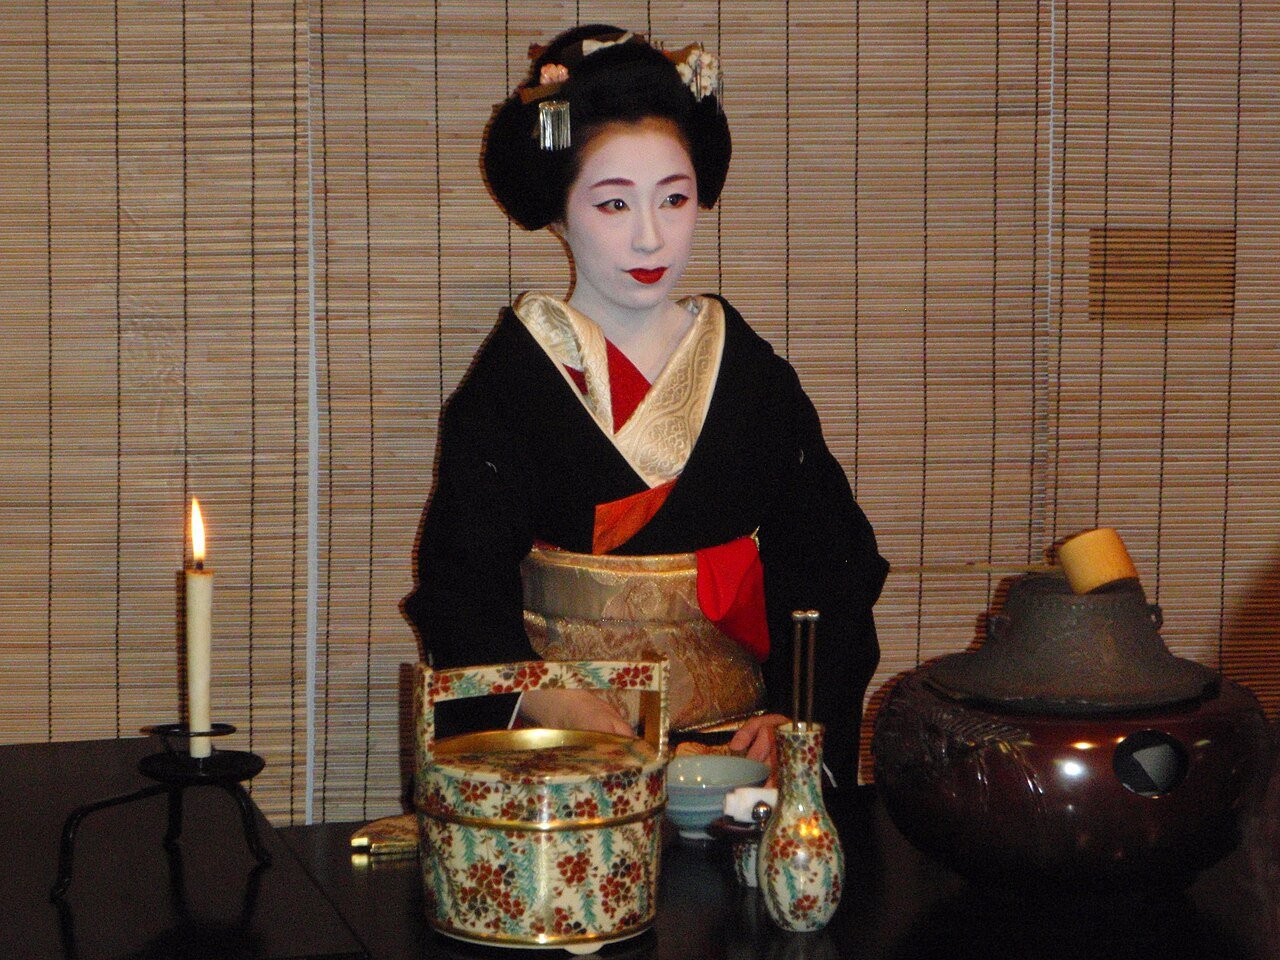
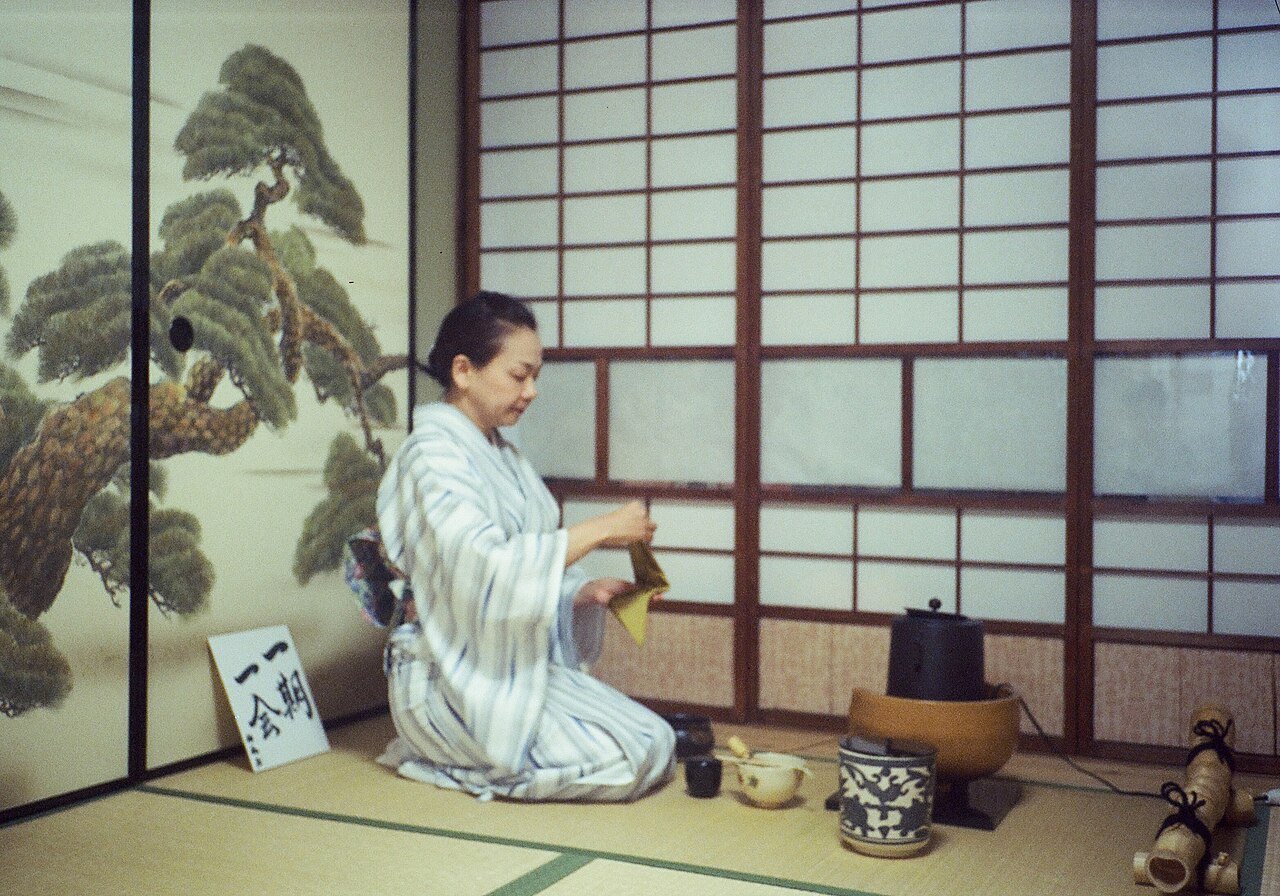
    Japanese tea ceremony host preparing tea in Kyoto
    A tea host preparing tea in Kyoto. Photo: Atticus Nguyen, CC BY-SA 4.0.

    A tea ceremony is one of Kyoto’s most popular cultural activities, but experiences vary widely. Some are short introductions designed for visitors. Others provide deeper instruction on the movements, utensils, room, and meaning behind the practice.

    How to Choose

    Read the description carefully. If you want more than a photo opportunity, look for a session that explains the steps and gives you time to ask questions.

    The Urasenke tradition is one major school of Japanese tea. You do not need to study tea formally before attending, but knowing that the practice has distinct schools and lineages helps you approach it with more respect.

    Basic Etiquette

    • Arrive on time.
    • Follow the host’s seating guidance.
    • Keep phones silent.
    • Ask before taking photos.
    • Listen before copying gestures.

    4. Wagashi-Making Class

    Wagashi are traditional Japanese sweets, often designed around seasons. A class can help you understand how color, shape, texture, and seasonal themes work together.

    Why It Pairs Well With Tea

    Many wagashi are designed to be eaten with tea, so a combined sweet-making and tea experience can create a fuller picture than doing either activity alone.

    Practical Tip

    If you have allergies, ask about ingredients in advance. Bean paste, rice flour, sugar, and coloring may be used, but recipes vary.

    5. Japanese Cooking Class

    A cooking class is useful if you want something you can repeat at home. Kyoto classes may focus on home-style dishes, vegetarian Buddhist cuisine, sushi, ramen, bento, or seasonal cooking.

    Choose a Class Based on What You Will Actually Cook Later

    A beautiful seven-course class may be memorable, but a simple home-cooking session can be more practical. Think about your goal.

    Useful Questions Before Booking

    • Is the class fully hands-on?
    • How many people are in the group?
    • Can dietary needs be accommodated?
    • Are recipes provided afterward?
    • How long is the session?

    6. Calligraphy

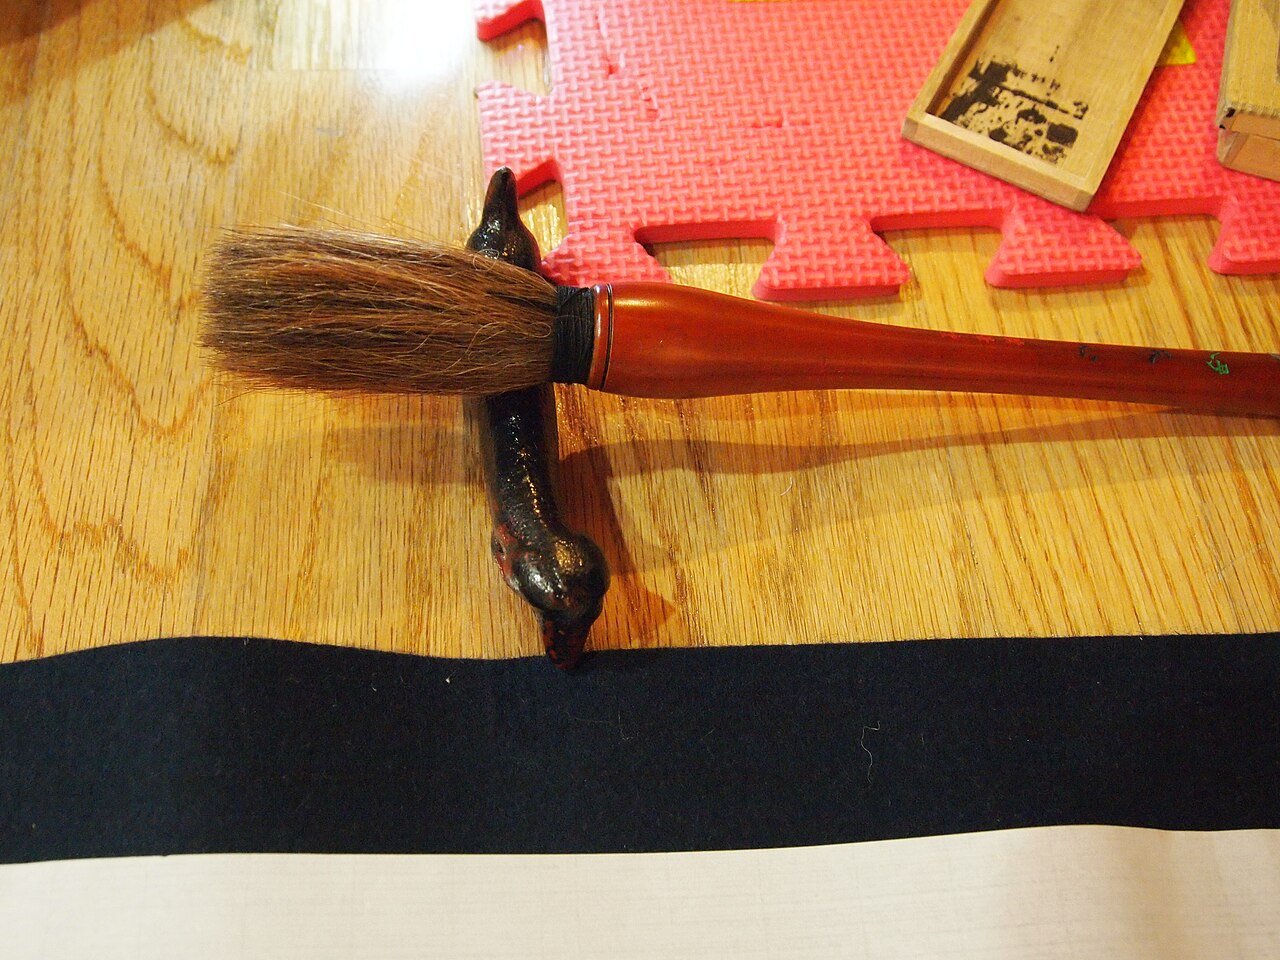
    Japanese calligraphy brush used for a hands-on shodo workshop
    A traditional Japanese calligraphy brush. Photo: Ph0kin, CC BY-SA 3.0.

    Japanese calligraphy, or shodō, looks simple until you try to control the brush. A beginner class usually explains posture, ink, brush pressure, and basic characters.

    Why It Works for a Short Visit

    Many sessions take about an hour. That makes calligraphy easy to add between a morning sightseeing block and an evening activity.

    You can also take home your work, which creates a more personal souvenir than a mass-produced item.

    7. Incense Appreciation or Incense-Making

    Kyoto has a deep connection with incense culture. Some experiences introduce fragrance materials and the formal appreciation of scent. Others let visitors blend a simpler incense product.

    Who Is It Best For?

    This is a good choice if you want a calm indoor activity, especially during rain or extreme heat. It also suits travelers who have already done tea or cooking classes and want something less common.

    8. Furoshiki Wrapping Workshop

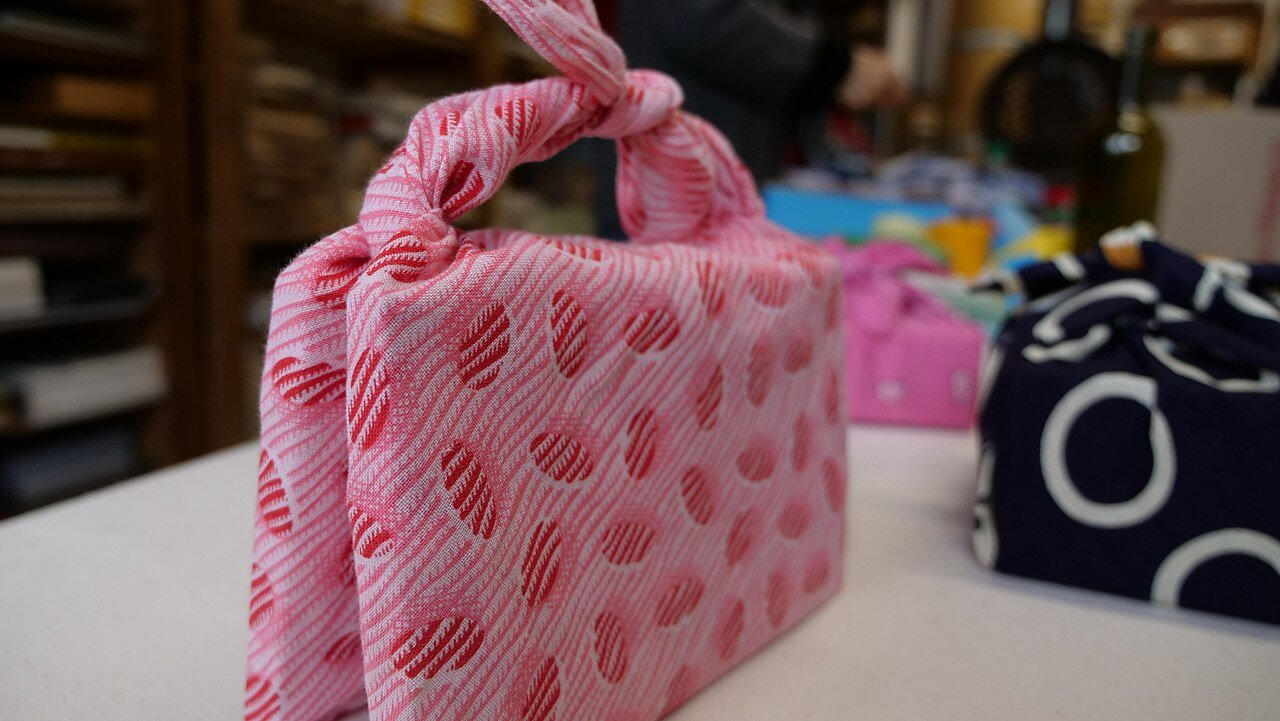
    Japanese furoshiki cloth wrapping technique for a Kyoto craft workshop guide
    Furoshiki cloth wrapping. Photo: Culture Japon, CC BY-SA 4.0.

    Furoshiki is the Japanese practice of wrapping and carrying items with cloth. A short class can teach several folds and knots.

    Why It Is Practical

    You can use the skill after the trip for gifts, storage, or carrying items. It also connects to low-waste habits because one piece of cloth can replace disposable wrapping.

    9. Gold Leaf, Lacquer or Decorative Craft Sessions

    Kyoto craft studios may offer beginner-friendly sessions using decorative techniques linked to traditional objects and interiors.

    Check How Much Is Demonstration Versus Hands-On

    Some premium experiences include a master artisan demonstration followed by a small visitor activity. Others are mostly DIY. Neither is automatically better, but know what you are paying for.

    10. Traditional Fan-Making or Painting

    Fans are strongly associated with Kyoto’s visual culture and performing arts. A fan-painting session can be a manageable activity for families and beginners.

    Shipping and Drying

    Ask whether the item will be dry and ready to pack by the end of the session. If not, plan how you will carry it.

    How to Tell Whether a Workshop Is Authentic and Respectful

    “Authentic” is often used as a marketing word. Instead of chasing that label, look for specific signs.

    Positive Signs

    • The instructor’s background is clearly explained.
    • The studio names the tradition or technique being taught.
    • The experience explains cultural context.
    • Class size is limited enough for instruction.
    • Photography rules are clear.
    • The booking page is honest about what beginners will actually do.

    Warning Signs

    • Promises of becoming a “master” in one hour.
    • No information about who teaches the session.
    • Heavy costume or photo focus with little explanation.
    • Unclear location or meeting instructions.

    How Much Time Should You Allow?

    Most beginner workshops take one to three hours. Do not book another activity immediately afterward. Allow at least 30 to 60 minutes of buffer for finding the studio, introductions, questions, and possible delays.

    A Good Half-Day Structure

    • 9:00 a.m.: Temple or neighborhood walk
    • 11:30 a.m.: Lunch
    • 1:00 p.m.: Workshop
    • 3:30 p.m.: Cafe or market
    • 5:00 p.m.: Flexible sightseeing

    This feels much better than stacking two workshops and three temples into one afternoon.

    Where to Fit Workshops in a Kyoto Itinerary

    Central Kyoto

    Good for activities near downtown shopping streets, markets, and major transport. Easy on rainy days.

    Higashiyama

    Pair a cultural workshop with temples and traditional streets, but start early because the area can become crowded.

    Arashiyama

    If your workshop is here, combine it with one or two nearby sights rather than returning to central Kyoto several times.

    Nishijin

    This area has strong textile connections and can be useful for craft-focused visitors.

    How to Avoid Overcrowding

    Kyoto’s popular areas can become busy. A workshop can help because it moves part of your day indoors and away from major photo spots.

    Use Early and Late Hours for Outdoor Sights

    Visit famous temples or streets early. Schedule your workshop around midday when crowds and heat may be stronger.

    This is more comfortable and makes better use of your time.

    Booking Tips

    Book Small Classes Early

    Artisan-led workshops may have only a few seats. If the experience matters to you, do not wait until the final day.

    Check Language Support

    Some instructors use interpreters, translated materials, or English-speaking assistants. Others teach mainly through demonstration.

    Check Cancellation Rules

    Small studios may have stricter policies because a canceled seat is hard to replace.

    Confirm the Exact Address

    Kyoto addresses can be confusing to first-time visitors. Save the location and arrive early.

    How Much Do Workshops Cost?

    Prices vary widely by craft, class length, materials, and instructor. A basic group session may cost much less than a private lesson with a specialist artisan.

    Decide What You Value

    If you want context and conversation, pay for a smaller class. If you mainly want a fun family activity, a larger beginner workshop may be enough.

    Compare what is included: materials, finished item, tea, meal, shipping, interpreter, or private instruction.

    Family-Friendly Options

    Pottery painting, furoshiki, fan painting, and simple sweet-making can work well for children. Always check minimum age requirements.

    A long formal tea session may be difficult for very young children, while a short interactive introduction can be easier.

    Best Options for Solo Travelers

    Group workshops are excellent for solo travelers because the activity creates natural conversation. Cooking, calligraphy, and craft classes are especially easy to join alone.

    If you prefer privacy, a one-on-one lesson may give you more instruction but will usually cost more.

    What to Wear

    Comfortable clothing is usually enough. Avoid sleeves that drag through paint, dye, food, or ink.

    For tea rooms, socks may be expected in some settings. Follow the instructions provided by the host.

    Photography Etiquette

    Ask before photographing artisans closely, especially in working studios. Do not assume that paying for a workshop gives you unlimited permission to film the process.

    If the teacher is explaining something, focus on the lesson rather than recording every second.

    Real-World Example: A Craft-Focused Day

    Start early in Higashiyama before the busiest crowds. Visit one temple and walk a traditional street. Have an early lunch. Take a taxi or bus to a textile workshop in the early afternoon. Spend two hours learning the process. Afterward, stop at a cafe and review what you made. Finish the day with a simple dinner near your hotel.

    This day includes sightseeing, learning, food, and rest without feeling rushed.

    Real-World Example: A Rainy Kyoto Day

    If heavy rain is forecast, move your outdoor sights to another day. Start with a market, take a wagashi class, have lunch, then do calligraphy or visit a museum. End with a tea experience.

    A rainy day does not have to become a lost day if your itinerary includes indoor cultural options.

    Common Workshop Mistakes

    Booking Based Only on Photos

    Read what you will actually do.

    Arriving Late

    Small classes may not be able to restart instructions for one person.

    Expecting Perfection

    Your first pottery piece or calligraphy sheet may not look professional. The process is the value.

    Choosing Too Many Activities

    One workshop per day is usually enough.

    Ignoring Shipping Costs

    Pottery or large craft pieces may cost more to ship than expected.

    Quick Decision Guide

    • Best for food lovers: Cooking or wagashi.
    • Best for calm travelers: Tea or incense.
    • Best for families: Pottery painting, fan painting, furoshiki.
    • Best for art lovers: Kyo-yuzen, calligraphy, ceramics.
    • Best souvenir: A small item you make yourself.
    • Best rainy-day option: Indoor craft or cooking class.

    Final Takeaway

    Kyoto’s best hands-on experiences give you more than a souvenir. They help you understand how a tradition is practiced, what materials matter, and why local skills have survived.

    Choose one workshop that genuinely matches your interests, check the instructor and class format, allow enough travel time, and build the rest of the day around it. Whether you make wagashi, practice calligraphy, dye fabric, shape clay, or learn tea etiquette, participation can turn a busy sightseeing trip into something more personal and memorable.

  • San Sebastián Food Guide 2026: Pintxos, Markets and a Smart One-Day Eating Route

    San Sebastián Food Guide 2026: Pintxos, Markets and a Smart One-Day Eating Route

    San Sebastián Food Guide 2026: Pintxos, Markets and a Smart One-Day Eating Route

    San Sebastián is one of Europe’s great food cities, but that reputation can make a first visit harder than expected. There are famous pintxos bars, Michelin-starred restaurants, seafood counters, bakeries, markets, and neighborhood places competing for your time. If you try to chase every recommendation, you can spend more time walking between saved pins than actually enjoying the city.

    This guide gives you a practical one-day eating route for 2026. It is built around variety rather than volume. You will visit a market, try classic pintxos, take a break between meals, and finish with a relaxed evening route. It also explains how to order, how much to eat at each stop, when to avoid the busiest streets, and how to enjoy Basque food without treating every bar like a checklist.

    For current local visitor information, use San Sebastián Turismo. For wider Basque Country travel information, see Basque Country Tourism.

    Why San Sebastián Is Especially Relevant in 2026

    Travelers in 2026 are showing stronger interest in local food culture, smaller-scale experiences, neighborhood eating, and hands-on discovery. San Sebastián fits that shift naturally. You do not need to book a luxury tasting menu to understand the city’s food identity. A market visit and several carefully chosen pintxos bars can be just as educational.

    The city also rewards slower travel. A good food day includes walking along the bay, pausing between bites, seeing what locals order, and returning to a neighborhood after the first rush has passed.

    First: Understand What Pintxos Are

    Pintxos are small bites associated with Basque bar culture. Some are simple, such as anchovies, peppers, or tortilla. Others are elaborate plated dishes made to order. The point is not to sit in one bar and order ten items. A classic approach is to have one or two pintxos and a drink, then move to another place.

    Do Not Confuse “Small” With “Cheap”

    A few pintxos can become expensive if you choose premium seafood, foie gras, or cooked-to-order specialties at several stops. Decide your budget before you begin.

    The Best Strategy: Four Food Moments, Not One Endless Meal

    Use the day in four parts:

    • Morning: Market and bakery
    • Lunch: Two or three pintxos bars
    • Afternoon: Walk, coffee, or beach break
    • Evening: A second short pintxos route or a seated dinner

    This keeps your appetite, energy, and spending under control.

    Morning: Start at La Bretxa Market

    Begin around the Old Town and visit Mercado de la Bretxa. Markets help you understand what appears later on restaurant menus. Look for fish, seasonal vegetables, peppers, cheese, preserved seafood, and local products.

    What to Look For

    • Fresh anchovies and other local seafood
    • Basque peppers
    • Idiazabal cheese
    • Seasonal mushrooms when available
    • Local preserves
    • Basque cider and txakoli displays

    You do not need to buy much. The goal is to build context for what you will eat later.

    Add a Simple Bakery Breakfast

    Keep breakfast light. A pastry, coffee, or small savory item is enough. If you eat a large breakfast, your pintxos route will become work rather than fun.

    San Sebastián food travel is easier when you leave room for spontaneous stops.

    Lunch Pintxos Route: How Many Bars?

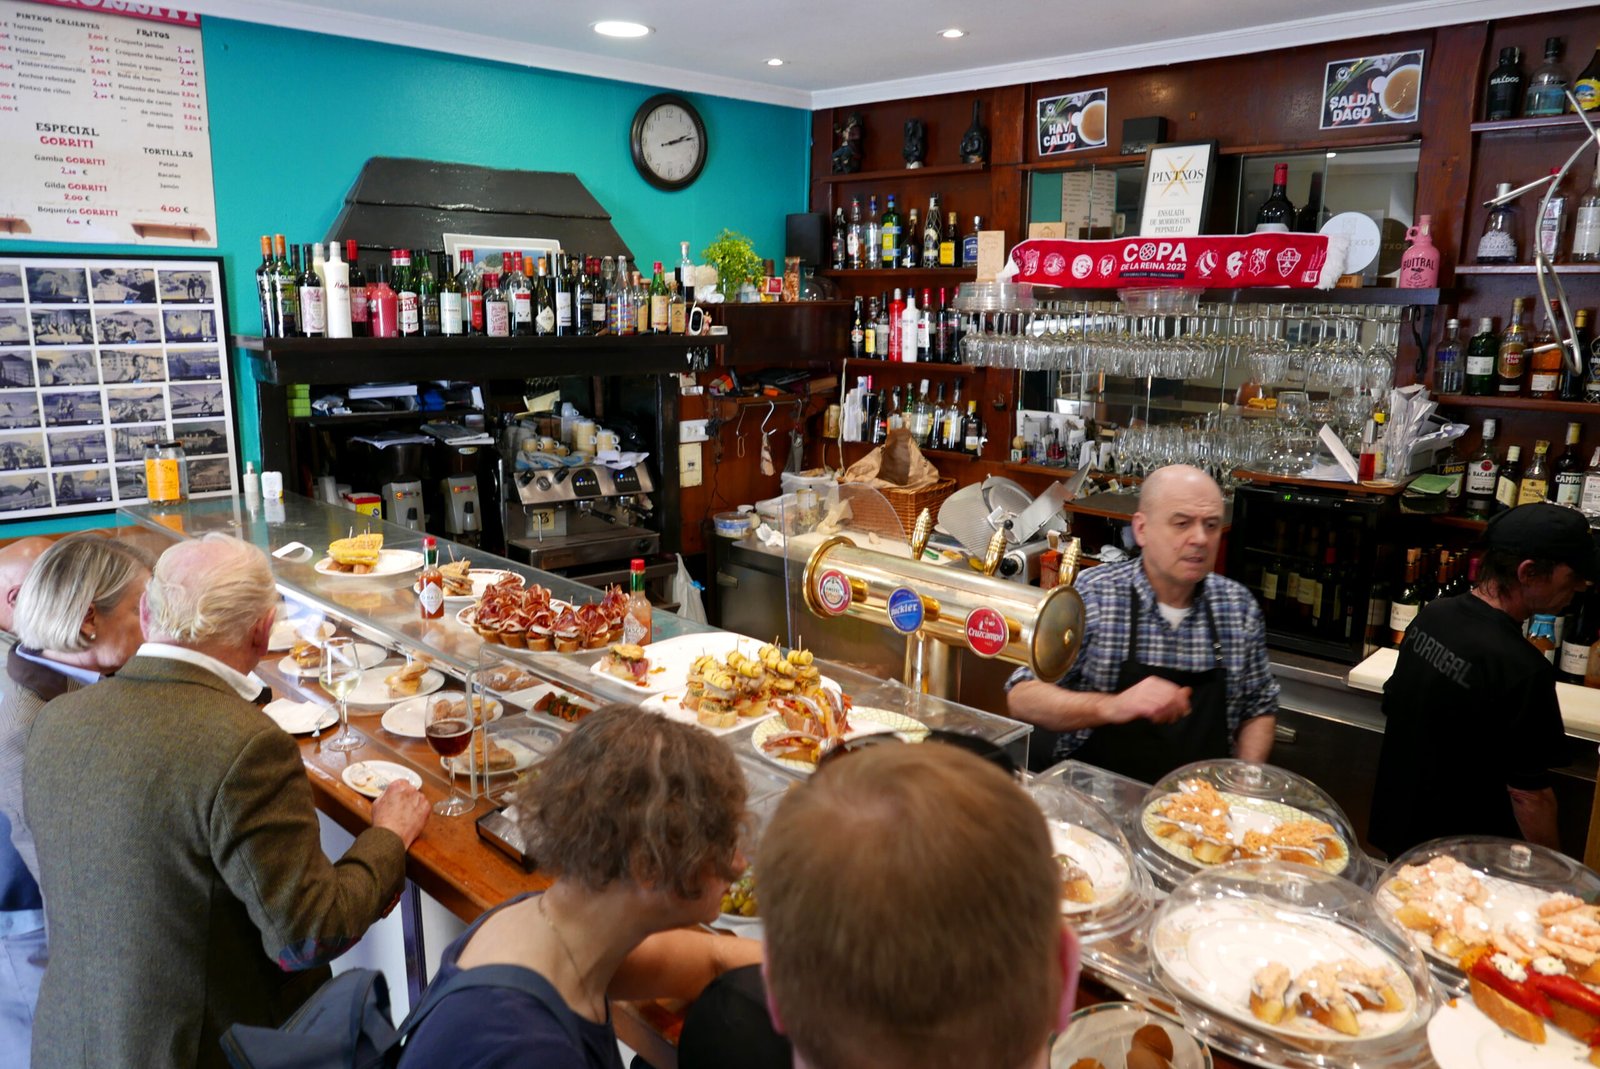
    Traditional pintxos bar in Donostia San Sebastian Spain
    A practical pintxos route works best when you keep each stop small. Order one or two items, notice what the bar does especially well, then move on only if you still have an appetite. This pacing gives you more variety, reduces unnecessary spending, and makes it easier to compare seafood, hot dishes, vegetables, and local specialties without turning the afternoon into one long heavy meal.

    Three bars is enough for most people. At each one, order one signature item and perhaps one simple classic. Share if you are traveling with someone.

    Why Three Works

    You get variety without spending the entire afternoon eating. It also gives you a chance to compare styles: one cold pintxo, one seafood item, and one hot cooked dish.

    How to Choose a Pintxos Bar

    Do not rely only on viral lists. Look for a mix of signals:

    • A focused menu rather than a huge tourist menu
    • Steady local traffic
    • Fresh turnover at the bar
    • Staff who can explain cooked specialties
    • Clear prices

    A crowded doorway is not always proof that the bar is better. Sometimes it means a place was recently featured online.

    What to Order: Build Variety

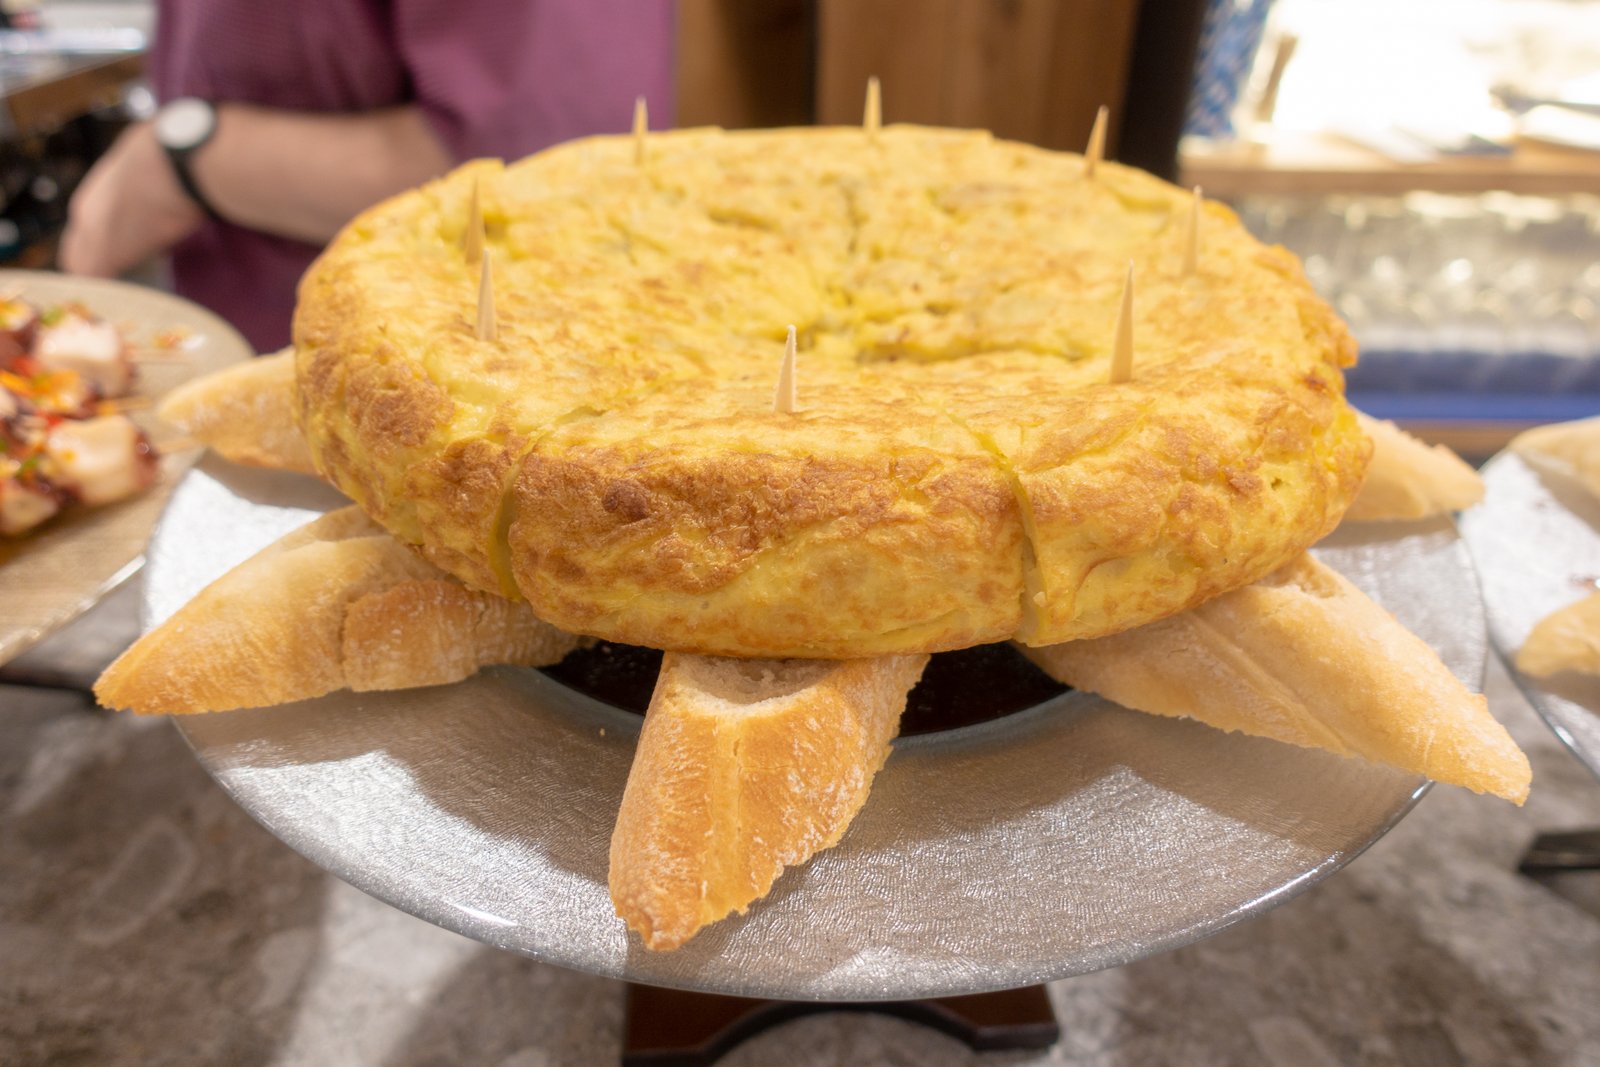
    Assorted pintxos in Donostia San Sebastian
    Choose different styles across the day—seafood, vegetables, hot dishes, and simple classics—to get variety without overeating.

    One Seafood Pintxo

    Anchovies, tuna, crab, prawns, octopus, or seasonal fish can give you a strong sense of the coast. Choose based on freshness and the bar’s specialty.

    One Vegetable or Pepper Dish

    Basque food is not only meat and seafood. Peppers, mushrooms, tomatoes, and seasonal vegetables can be excellent.

    One Hot Dish

    Many of the best pintxos are made to order. Ask what the kitchen is known for rather than only taking items displayed on the counter.

    One Cheese-Based Bite

    Idiazabal cheese is worth trying if you enjoy firm sheep’s-milk cheese. It may appear in simple or more modern preparations.

    How to Order Without Feeling Lost

    Ordering style varies from bar to bar. Some places display cold pintxos while hot dishes are listed on a board. Others work more like a small restaurant.

    A Simple Process

    1. Look at the bar and menu first.
    2. Choose one or two items.
    3. Order clearly at the counter.
    4. Ask whether hot items are made to order.
    5. Keep track of what you consume if the bar uses an informal system.

    If you are unsure, ask staff. A short polite question is better than guessing.

    What to Drink

    Txakoli

    Txakoli is a lightly sparkling, high-acid Basque wine that pairs well with seafood. You do not need to become an expert. Try one small glass and see whether you enjoy it.

    Basque Cider

    Cider is another regional option. It is often dry rather than sweet.

    Non-Alcoholic Choices

    You can absolutely do a pintxos route without alcohol. Sparkling water, soft drinks, or alcohol-free beer are fine. Food should remain the focus.

    Midday Break: Walk La Concha

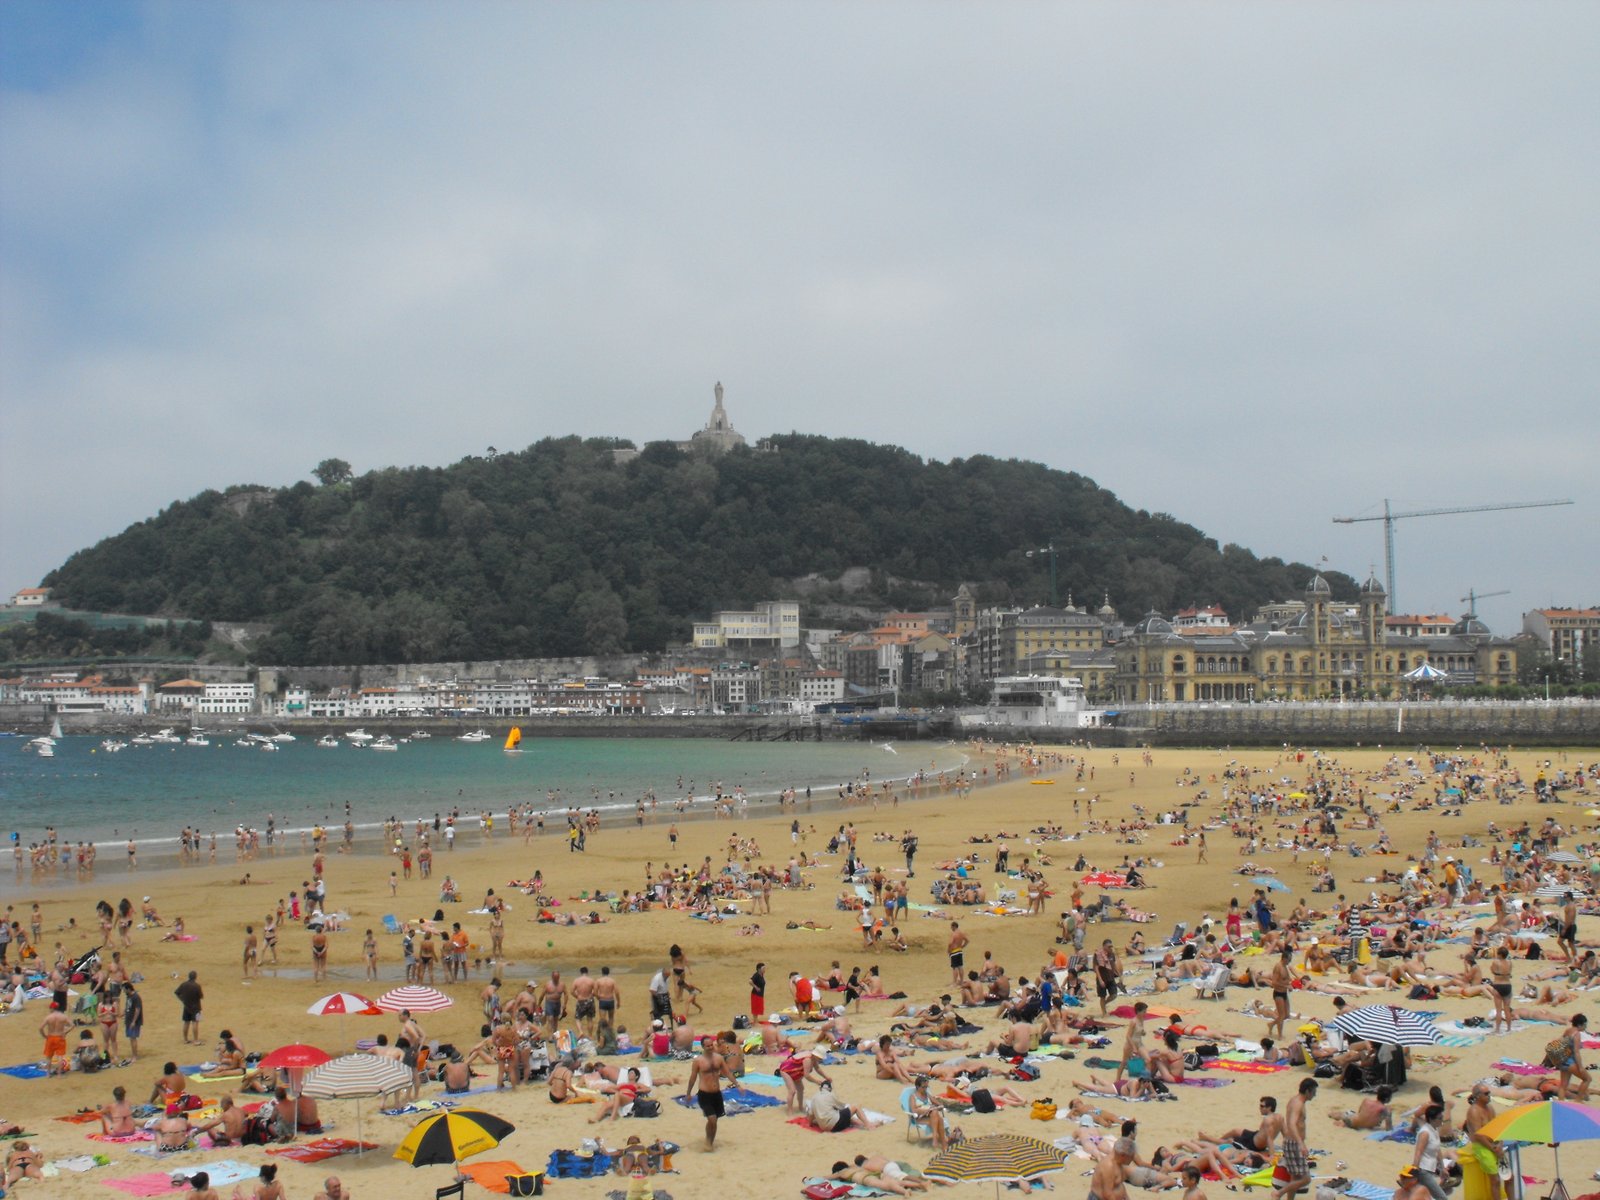
    La Concha Bay and beach in San Sebastian Spain
    A walk around La Concha creates a useful break between lunch and the evening food route.

    After lunch, stop eating for a while. Walk along La Concha Beach or sit near the bay.

    This break serves two purposes. It lets you enjoy another side of the city, and it stops the day from becoming a continuous food challenge.

    Afternoon: Coffee, Pastry, or Nothing

    You do not have to consume something every hour. If you are hungry, choose coffee and a small pastry. If not, keep walking.

    Travel food content often makes people feel they must try everything. In reality, the best food trip leaves room to notice what you actually enjoy.

    Optional Stop: Gros Neighborhood

    Cross toward Gros if you want a change from the Old Town. The neighborhood has its own bars, cafes, and a more residential feel. It also places you near Zurriola Beach.

    Why Gros Helps

    If the Old Town feels too crowded, Gros can reset the day. You may also find more space for a seated coffee or casual dinner.

    Evening Option 1: A Second Pintxos Route

    If you still want variety, choose two bars and stop there. Make the evening route different from lunch.

    For example, if lunch focused on seafood, choose one meat dish and one vegetable-forward dish in the evening.

    Evening Option 2: Sit Down for Dinner

    A seated dinner can be the better choice if you want to slow down. You do not need a Michelin-starred restaurant to eat well in San Sebastián.

    Look for a restaurant with a concise seasonal menu and clear sourcing. Reservations are useful on weekends.

    Should You Book a Michelin-Starred Restaurant?

    San Sebastián and the surrounding region are famous for high-end dining. A tasting menu can be memorable, but it changes the structure of the day.

    Book One If

    • Fine dining is a major reason for your trip.
    • You are comfortable with the cost.
    • You enjoy long tasting menus.
    • You can reserve well in advance.

    Skip It If

    • You prefer casual local eating.
    • You have a tight budget.
    • You do not enjoy multi-hour meals.
    • You want to explore several neighborhoods.

    Neither choice is more “authentic.” They are different experiences.

    How to Avoid Tourist-Trap Dining

    Do Not Choose Only by Location

    A restaurant facing a famous square may be convenient, but compare the menu and reviews before sitting down.

    Avoid Huge Multi-Cuisine Menus

    A focused menu is often a better sign in a city known for specific regional cooking.

    Check Price Clarity

    For seafood sold by weight or market price, understand the pricing before ordering.

    Do Not Assume a Long Queue Guarantees Quality

    Online fame can create lines. If a place is overwhelmed, there are usually other excellent options nearby.

    Food Safety and Allergy Planning

    If you have food allergies, do not rely on appearance. Pintxos can contain hidden nuts, dairy, gluten, seafood, or sauces.

    Carry a clearly translated allergy card in Spanish and, if useful for your trip, Basque. Ask before ordering. For serious allergies, choose places where staff can explain ingredients rather than relying only on buffet-style counter items.

    Vegetarian Travelers

    Vegetarian options exist, but not every bar will have a wide choice. Look for mushrooms, peppers, tortilla, cheese, tomato dishes, and vegetable-based cooked items.

    Ask whether stock, sauces, or toppings contain meat or fish if that matters to your diet.

    How Much Should You Budget?

    Your cost depends on how many bars you visit and what you order. Premium seafood and high-end restaurants can raise the total quickly.

    A Practical Budget Method

    Set a food budget for the whole day, then divide it roughly into lunch, evening, and snacks. Keep a small buffer for one unexpected specialty.

    Two travelers can also share dishes at many stops. That gives you more variety without doubling the food.

    What Food Souvenirs Make Sense?

    • Packaged Basque sweets
    • High-quality canned seafood where import rules allow
    • Local salt or seasonings
    • Packaged cheese if legal to bring home
    • Wine or cider within airline and customs limits

    Check the customs rules of your destination country before buying animal products or alcohol.

    Realistic One-Day Food Itinerary

    9:00 a.m. — Coffee and Light Breakfast

    Keep it small.

    10:00 a.m. — La Bretxa Market

    Browse fish, produce, cheese, and pantry products.

    12:30 p.m. — Pintxos Stop 1

    Choose one classic cold pintxo and a drink.

    1:15 p.m. — Pintxos Stop 2

    Order a hot seafood or seasonal specialty.

    2:00 p.m. — Pintxos Stop 3

    Try a different style, then stop eating.

    3:00 p.m. — La Concha Walk

    Take a proper break.

    5:00 p.m. — Coffee or Gros Walk

    Use your appetite as the guide.

    8:00 p.m. — Dinner or Two-Bar Evening Route

    Choose one approach, not both.

    Common San Sebastián Food Mistakes

    Eating Too Much at the First Bar

    You lose the main advantage of pintxos culture: variety.

    Chasing Every Viral Recommendation

    You can waste time crossing town and waiting in lines.

    Skipping the Market

    You miss the ingredients behind the restaurant dishes.

    Drinking Too Fast

    Several small glasses across multiple bars can add up.

    Ignoring Neighborhoods Outside Parte Vieja

    The Old Town matters, but Gros and other areas add balance.

    How to Make the Experience Feel Local Rather Than Performative

    Street in Donostia San Sebastian Old Town area
    San Sebastian’s central streets are part of everyday local life as well as the visitor experience. Keep entrances clear, respect residents, and avoid stopping busy foot traffic for long photo sessions.
    Old Town street scene in San Sebastian Spain
    Treat the Old Town as a living neighborhood: keep doorways clear, respect staff, and avoid turning busy bars into photo sets.

    Watch how the room works before ordering. Do not block the counter for photos. Keep your group compact. Ask concise questions. Move on when you are finished rather than occupying a busy standing space for a long time.

    Food travel is better when the place remains a functioning local business, not merely a backdrop for content.

    Final Takeaway

    A great food day in San Sebastián is not measured by how many famous bars you visit. It is measured by variety, pacing, and how much you learn about Basque food along the way.

    Start at a market, keep breakfast light, choose three lunch stops, walk by the bay, and decide whether the evening should be another short pintxos route or a seated dinner. Order one or two items at a time, try seasonal food, and leave room for surprises. That approach gives you a richer experience than racing through a list of saved restaurants.

  • Japan Grocery Store Tourism in 2026: What to Buy, Try and Bring Home

    Japan Grocery Store Tourism in 2026: What to Buy, Try and Bring Home

    Japan Grocery Store Tourism in 2026: What to Buy, Try and Bring Home

    One of the most useful travel trends in 2026 is also one of the simplest: visiting local grocery stores. In Japan, this can be far more interesting than it sounds. Supermarkets, department-store food halls, convenience stores, and neighborhood markets show you what people actually eat between restaurant visits. They are also good places to find affordable meals, regional snacks, seasonal products, and practical souvenirs.

    This guide is not about buying random viral snacks. It shows you how to use grocery shopping as a travel experience. You will learn where to go, what to look for, how to read labels, how to avoid common etiquette mistakes, and which products are easier to bring home.

    For current travel guidance and local etiquette, use the Japan National Tourism Organization.

    Why Grocery Store Tourism Is Growing

    Travelers increasingly want experiences that feel local and affordable. Restaurants remain important, but supermarkets reveal another side of food culture. You see everyday prices, seasonal produce, ready meals, regional sauces, lunch habits, and packaging that reflects local preferences.

    Japan works especially well for this because food retail is diverse. A small convenience store, a suburban supermarket, a basement food hall in a department store, and a regional market can all feel completely different.

    It Is Also Useful for Your Budget

    If you eat every meal in a restaurant, daily food costs add up quickly. A supermarket breakfast, picnic lunch, or ready-made dinner can create room in your budget for one special restaurant experience.

    Start With a Real Supermarket, Not Only Convenience Stores

    Japanese supermarket food aisle with everyday groceries
    A full supermarket shows a wider view of everyday Japanese food than a convenience store, including produce, pantry staples, fresh foods, and prepared meals.

    Convenience stores are famous, but they are only part of the picture. Visit at least one full-size supermarket. Larger stores usually have better produce sections, fresh fish, bakery items, household products, local sauces, and wider prepared-food choices.

    What to Notice

    • Seasonal fruit and vegetables
    • Different grades of rice
    • Miso varieties
    • Fresh noodles
    • Pickles
    • Seaweed
    • Tea
    • Regional curry and soup bases
    • Prepared bento
    • Local sweets

    Spend ten minutes looking before buying. The first aisle is rarely the most interesting.

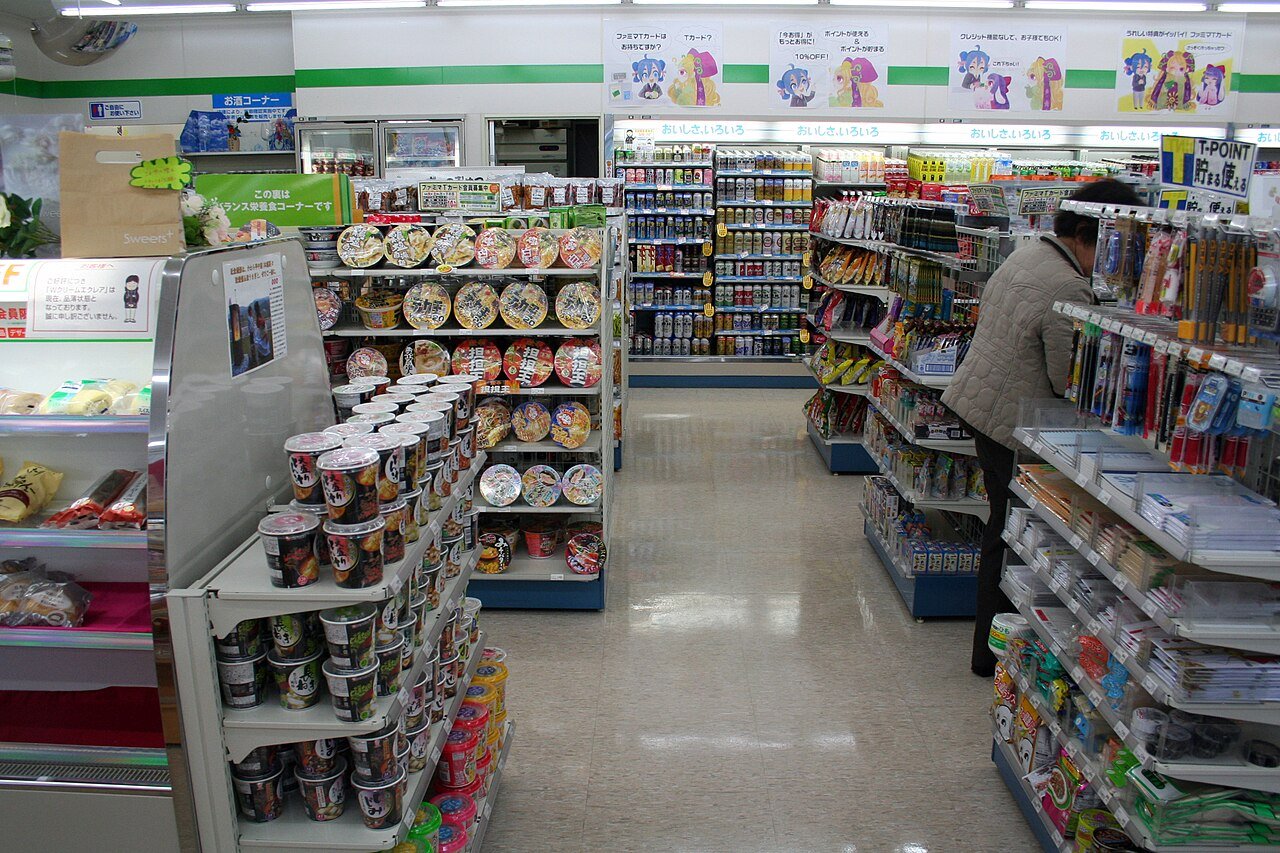
    Convenience Stores: Best for Practical Travel Food

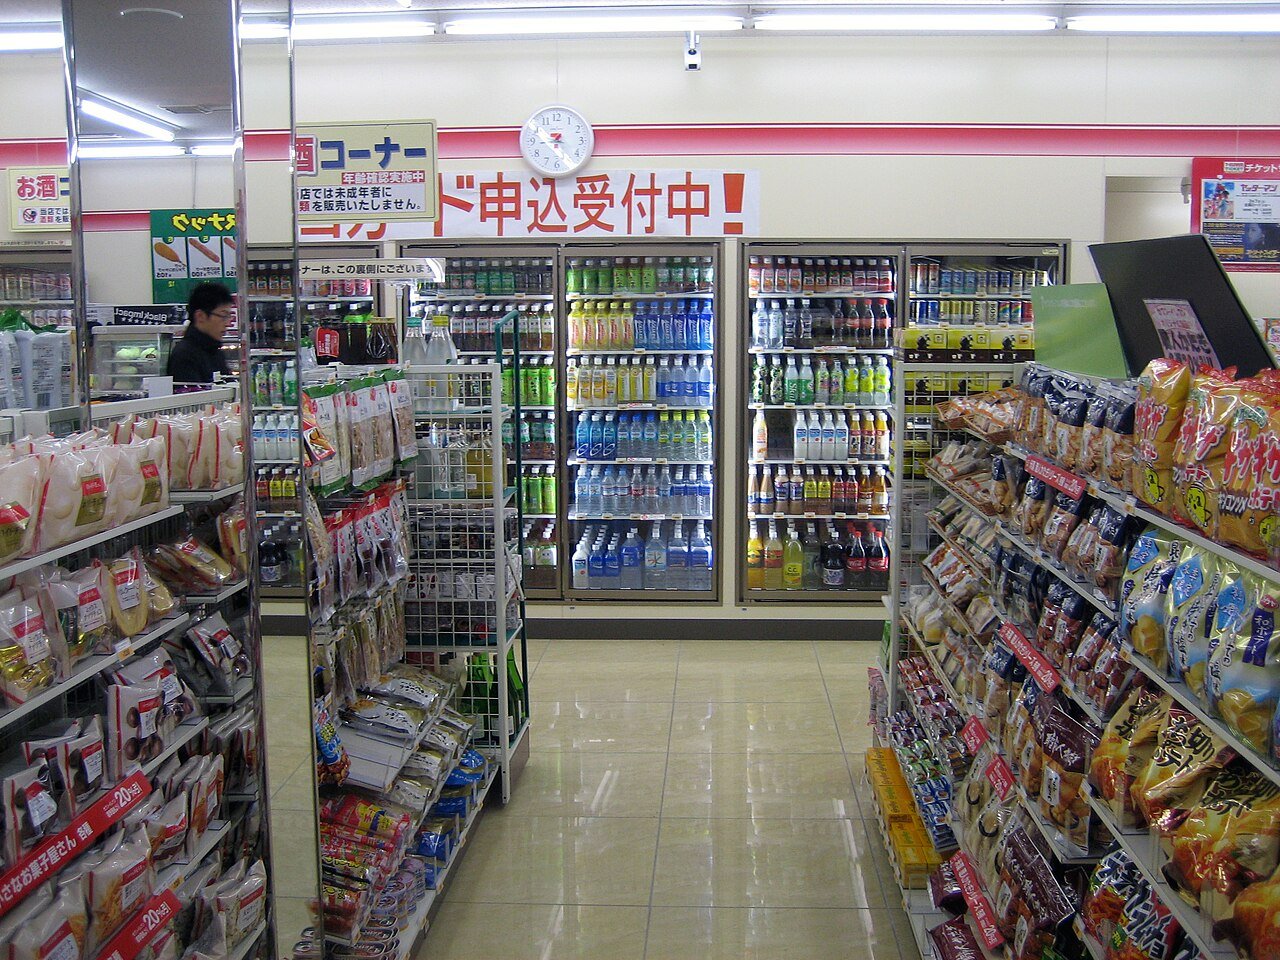
    Lawson convenience store interior in Japan with ready-to-eat food
    Convenience stores are useful for quick breakfasts, train snacks, drinks, and simple meals when restaurant timing does not fit your day.
    Inside a Lawson convenience store in Japan with drinks and prepared food
    Lawson convenience store interior in Japan. Photo: Corpse Reviver, CC BY-SA 3.0.

    Japan’s major convenience-store chains include 7-Eleven Japan, Lawson, and FamilyMart. Their selections vary by store and season.

    Useful Things to Buy

    • Onigiri
    • Sandwiches
    • Yogurt
    • Tea and coffee
    • Simple desserts
    • Salads
    • Hot snacks
    • Travel-size toiletries

    Convenience stores are especially useful on early train days when cafes are not yet open.

    Department-Store Food Halls: Best for Browsing

    Japanese department store food hall with prepared foods and gifts
    Depachika food halls are useful for comparing premium prepared foods, sweets, gift boxes, bakery items, and seasonal specialties in one place.

    The basement food halls of Japanese department stores are often called depachika. They are excellent for seeing high-quality prepared foods, confectionery, gift boxes, sushi, fruit, bakery products, and seasonal specialties in one place.

    Prices can be higher than a supermarket, but browsing is part of the experience. If you want a premium food souvenir without visiting several specialty shops, this can be efficient.

    Best Time to Visit

    Go before the final hour if you want the widest choice. Some prepared foods may be discounted near closing, but the most popular products can sell out first.

    What to Try: Rice and Onigiri

    Japanese onigiri rice balls sold as practical travel food
    Onigiri is one of the easiest travel foods to try because it is portable, affordable, and sold with many fillings across Japan.

    Rice is central to Japanese food culture, and supermarkets show how many options exist. You may see different regions, grain styles, and premium labels.

    Onigiri is one of the easiest ready-to-eat foods for travelers. Fillings can include salmon, tuna mayonnaise, pickled plum, kombu, and many seasonal options.

    Practical Tip

    If the wrapper looks complicated, watch the numbered opening steps printed on the package. The design usually keeps the seaweed separate from the rice until you unwrap it.

    What to Try: Bento

    Supermarket bento is useful when you want a full meal without restaurant time. Options can include grilled fish, fried chicken, rice, vegetables, noodles, and regional dishes.

    How to Choose

    Look at the use-by time and storage instructions. Buy chilled food close to when you plan to eat it. Do not carry a seafood bento around all afternoon in warm weather.

    If you have access to a microwave, some stores can heat suitable items. Ask staff politely rather than assuming every package should be reheated.

    What to Try: Seasonal Snacks

    Japan releases many seasonal flavors. You may find limited versions of chocolate, crackers, drinks, instant noodles, and sweets tied to a region or time of year.

    The best approach is to buy a few items that are genuinely different, not a suitcase full of novelty packaging.

    Good Souvenir Test

    Ask three questions: Is it easy to pack? Is it allowed through customs at home? Will the person receiving it actually eat it?

    What to Try: Tea

    Green tea is an easy product to explore. Look for sencha, hojicha, genmaicha, and matcha products. Supermarkets can be more approachable than specialist shops if you are new to Japanese tea.

    For higher-grade matcha, a specialist tea shop may be more appropriate. Grocery stores are better for everyday tea and casual gifts.

    What to Try: Miso and Soup Bases

    Miso comes in many styles, and supermarkets make the differences visible. Color, region, ingredients, and salt level can vary.

    If you are traveling with only hand luggage, check liquid and paste restrictions before buying large tubs. Single-serve soup packets are easier to pack.

    Regional Grocery Shopping Is More Interesting Than Buying the Same Products Everywhere

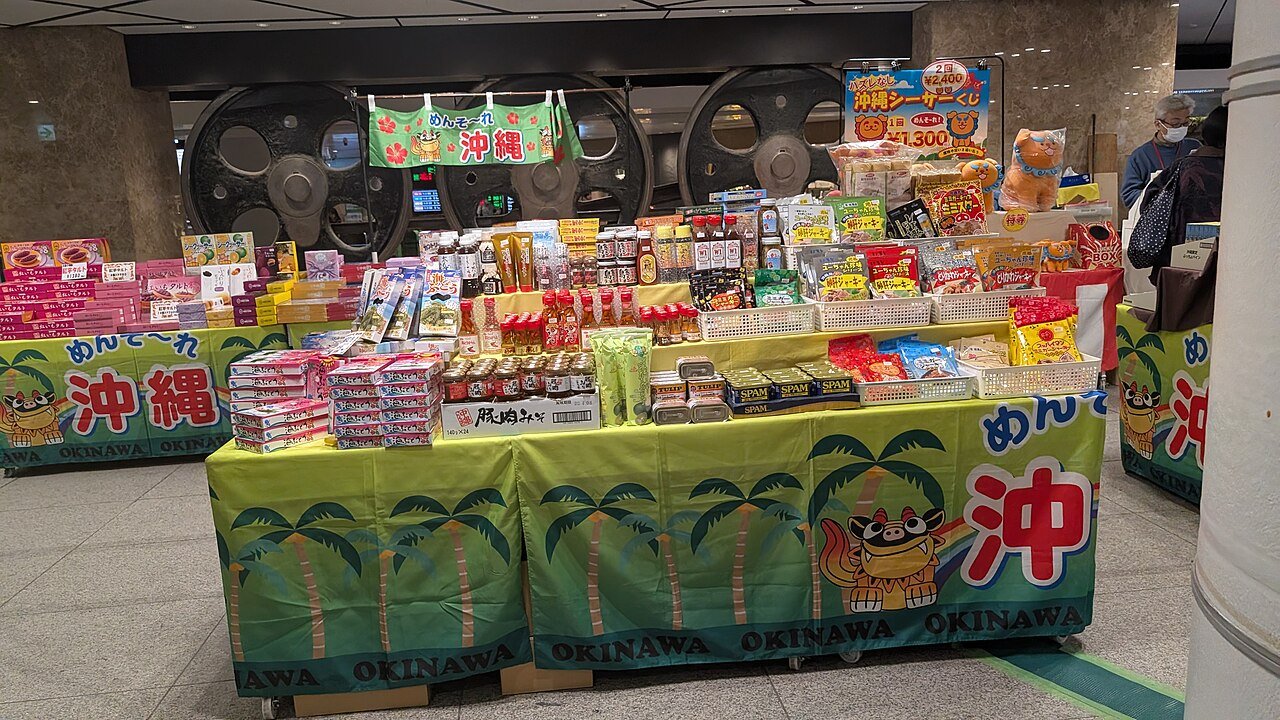
    Regional packaged food display in a Japanese store with Okinawa products
    Regional products can turn an ordinary store visit into a useful food discovery stop. Photo: Geetashri Gagoi Apte, CC BY-SA 4.0.

    Do not treat every Japanese supermarket as identical. Regional foods change as you travel.

    Tokyo

    Tokyo gives you huge variety, specialty food halls, and access to products from all over the country. It is ideal for comparison shopping.

    Kyoto

    Look for tea products, traditional sweets, pickles, and items linked to Kyoto cooking. Markets and department stores can add context beyond a standard supermarket.

    Osaka

    Osaka is known for casual food culture. Grocery sections may feature sauces, snacks, and ready foods connected to local tastes.

    Hokkaido

    Dairy, corn, potatoes, seafood products, and regional sweets become more noticeable. Perishable food may not be practical to take home, but local packaged products can be.

    Okinawa

    Look for local ingredients, sweets, salt products, tea, and seasonings that differ from mainland Japan.

    How to Read Food Labels When You Do Not Speak Japanese

    Translation apps can help, but do not rely on them as the only safety tool if you have a serious allergy.

    Use Three Layers of Checking

    1. Read any English labeling provided.
    2. Use a translation app for the ingredient list.
    3. If the allergy is serious, ask staff or carry a professionally translated allergy card.

    The Consumer Affairs Agency of Japan provides official information related to food labeling and allergens.

    Do Not Guess From the Picture

    A rice snack can contain fish, soy, sesame, dairy, or other ingredients that are not obvious from the front of the package.

    Vegetarian and Vegan Travelers

    Japan has more vegetarian and vegan choices than many first-time visitors expect, but hidden ingredients can be a challenge. Dashi may contain fish even when a dish looks vegetable-based.

    In supermarkets, check soups, sauces, seasoning packets, and prepared foods carefully. A translation card that clearly explains your diet can save time.

    How to Shop Politely

    FamilyMart convenience store interior in Japan with packaged food and drinks
    Busy convenience stores are everyday local spaces, so keep aisles clear and avoid blocking shoppers for photos. Photo: Corpse Reviver, CC BY-SA 3.0.

    Grocery shopping is everyday life for local residents. A few simple habits make the experience smoother.

    • Do not block narrow aisles for long photos.
    • Do not open food before paying.
    • Follow checkout instructions.
    • Use the bagging area if the store has one.
    • Keep voices low.
    • Do not handle fresh food unnecessarily.

    If photography is restricted, respect the rule. Not every store is a tourist attraction.

    When Supermarkets Discount Prepared Food

    Some stores reduce the price of prepared food later in the day as the use-by time approaches. This can be good value, but do not build your whole dinner plan around finding a specific discount.

    Availability depends on the store, day, and product. If you need a meal, buy what you want at the time you need it.

    Food You Should Be Careful About Bringing Home

    Customs rules vary by country. Meat, fresh fruit, seeds, dairy, and other agricultural products can be restricted.

    Before buying food as a souvenir, check your destination country’s official customs or agriculture rules. Packaged candy or tea may be simple, while fresh produce or meat products can create problems.

    Do Not Rely on “Sealed Package” as Proof

    A sealed commercial package is not automatically allowed. The ingredient and your destination’s import rules matter.

    Best Grocery Souvenirs for Easy Packing

    • Tea bags or loose tea in sealed packs
    • Packaged sweets
    • Rice crackers
    • Seasoning packets
    • Furikake, if allowed at your destination
    • Instant soup packets
    • Small packaged coffee products
    • Local candy
    • Dry noodles, where permitted
    • Non-food items such as kitchen cloths or stationery from larger stores

    Place fragile packages inside clothing and keep liquids or pastes within airline rules.

    How Much Should You Budget?

    Grocery shopping can lower food costs, but it is easy to overspend on novelty snacks.

    Use a Simple Daily Rule

    Choose one practical grocery purchase and one fun purchase. For example, buy breakfast for tomorrow and one regional snack. This keeps the activity useful instead of turning it into random shopping.

    A Practical Tokyo Grocery-Tourism Route

    7-Eleven convenience store interior in Japan with ready-to-eat food shelves
    A practical route can combine one supermarket, one food hall, and one convenience store instead of crossing the city only to shop. Photo: Corpse Reviver, CC BY-SA 3.0.

    You do not need a formal tour. Build grocery stops around places you already plan to visit.

    • Start with a neighborhood supermarket near your hotel.
    • Visit a department-store food hall near a major station.
    • Use a convenience store for a practical train snack.
    • Finish with one specialty shop if you discover a product you want to understand better.

    This approach avoids spending half a day crossing Tokyo only to visit stores.

    How Grocery Shopping Can Improve Restaurant Choices

    Supermarkets teach you what ingredients are in season. If you notice mushrooms, citrus, chestnuts, or a particular fish appearing everywhere, you can look for those ingredients on restaurant menus too.

    That turns grocery shopping into research for the rest of your trip.

    Real-World Example: A Budget Food Day in Kyoto

    Imagine you have one expensive kaiseki dinner booked. Instead of also paying for a restaurant breakfast and lunch, start with yogurt, fruit, and tea from a supermarket. At lunch, choose an onigiri and a small prepared dish. Spend the afternoon exploring, then enjoy the special dinner without feeling that food costs are out of control.

    You have not “missed” Japanese food. You have experienced two different parts of it: everyday eating and formal dining.

    Common Grocery-Tourism Mistakes

    Buying Too Much on Day One

    You will see more products later. Leave luggage space and compare before buying gifts.

    Ignoring Expiry Dates

    Prepared food may be intended for same-day eating.

    Assuming Every Snack Is Unique to Japan

    Check whether the item is actually regional or simply an international product in different packaging.

    Blocking Local Shoppers

    Move aside before taking photos or translating labels.

    Forgetting Customs Rules

    A product that is legal to buy in Japan may not be legal to bring into your home country.

    A Quick Grocery Checklist

    • Visit one full supermarket.
    • Try one regional ready-to-eat item.
    • Look at seasonal produce.
    • Compare tea or pantry staples.
    • Check allergy labels carefully.
    • Buy only souvenirs you can legally bring home.
    • Keep receipts for expensive products.
    • Carry a reusable bag when appropriate.

    How to Keep Grocery Shopping From Taking Over the Trip

    Set a clear time limit before entering a large store. Thirty to forty-five minutes is usually enough for a useful browse unless you are shopping for a full meal. Photograph products you may want to compare later instead of buying everything immediately. If you see the same snack or tea in several cities, wait until the final part of the trip before buying larger quantities. This keeps luggage lighter, reduces impulse purchases, and gives you time to notice which products are truly regional rather than simply popular nationwide.

    Final Takeaway

    Grocery-store tourism in Japan works because it is useful and cultural at the same time. You can save money, discover regional flavors, learn what people eat every day, and find souvenirs that feel more personal than airport gifts.

    Start with a real supermarket, use convenience stores for practical meals, visit a department-store food hall for variety, and pay attention to regional products as you move between cities. Keep allergy safety, etiquette, and customs rules in mind. The best grocery trip is not about buying the most unusual thing on the shelf. It is about noticing the everyday food culture that sits between the famous restaurants.

  • Noctourism in 2026: How to Explore Cities at Night Safely and Beat the Heat

    Noctourism in 2026: How to Explore Cities at Night Safely and Beat the Heat

    Noctourism in 2026: How to Explore Cities at Night Safely and Beat the Heat

    Night travel is no longer just about bars and clubs. In 2026, more travelers are planning museum evenings, sunset walks, stargazing, night markets, late-opening landmarks, and guided after-dark tours. This trend is often called noctourism. It is gaining attention for a simple reason: cities can feel cooler, calmer, and visually different after sunset.

    Illuminated Singapore skyline showing a well-lit area for night sightseeing
    Well-lit active districts are easier to navigate after dark. Photo: Mokkie, CC BY-SA 4.0.

    That does not mean every daytime activity should be moved to midnight. The best night itinerary is deliberate. You need safe transport, realistic opening hours, a clear route, and a plan for getting back to your hotel. This guide explains how to use noctourism as a practical travel strategy, especially in hot destinations or crowded cities.

    Always check official destination pages, attraction schedules, and local transport operators before heading out. Opening hours and last-train times can change by season or day of the week.

    What Is Noctourism?

    Noctourism means traveling or sightseeing after dark as a main part of the experience. It can include:

    • Night markets
    • Late museum openings
    • Illuminated historic areas
    • Sunset and evening cruises
    • Stargazing
    • Night safaris
    • After-dark walking tours
    • Evening food tours
    • Night photography
    • Concerts or cultural performances

    The idea is not new, but travelers are using it more intentionally. Rising daytime temperatures in some destinations, crowded attractions, and interest in immersive local experiences all make evening travel more appealing.

    Why Night Sightseeing Can Improve a Trip

    Cooler Temperatures

    In hot destinations, walking after sunset can be much more comfortable than exploring at 2 p.m. This is especially useful in parts of southern Europe, the Middle East, and Asia during warmer months.

    Fewer Day-Trip Crowds

    Some historic districts become quieter after tour buses leave. You may still see local evening crowds, but the experience can feel less rushed.

    Different Atmosphere

    Lighting changes architecture, waterfronts, plazas, and old streets. A place you saw at noon can feel completely different after sunset.

    More Flexible Days

    Night activities let you rest during the hottest hours or spend midday indoors. That can make a long trip less exhausting.

    Step 1: Check Whether the Destination Actually Works at Night

    Do not assume every tourist area stays active after dark. Some places close early. Others become lively only after 8 p.m.

    Research These Five Things

    • Last entry time for attractions
    • Public transport operating hours
    • Whether the area is active after dark
    • Availability of licensed taxis or ride-hailing
    • Lighting and pedestrian access

    A famous viewpoint may be beautiful at sunset but unsafe or inaccessible after the official closing time. Always respect barriers and posted hours.

    Step 2: Build a Short Night Route

    City skyline at dusk for planning a compact evening sightseeing route
    A dusk start gives travelers time to see a city transition into night. Photo: chenisyuan, CC BY-SA 4.0.

    A good night route is compact. You do not want to cross a large city several times after transport frequency drops.

    Choose two or three stops in one area. For example:

    • Sunset viewpoint
    • Dinner or food market
    • Illuminated landmark

    Then return to your hotel using one simple route.

    Realistic Example

    Suppose you are in a hot Mediterranean city. Instead of visiting the old town at midday, spend the afternoon in a museum. Return to the hotel for a break. Go out around sunset, walk the historic center, eat dinner nearby, and take a direct metro or taxi back. This reduces heat exposure and avoids needless backtracking.

    Step 3: Decide Your Return Transport Before You Leave

    This is one of the most important night-travel habits. Do not wait until 12:30 a.m. to learn that the metro stopped at midnight.

    Before Going Out, Confirm

    • Last metro or train
    • Night-bus routes
    • Taxi stands
    • Ride-hailing availability
    • Estimated walking time
    • Whether your hotel reception is open late

    Save the hotel address offline in the local language when useful. A screenshot can help if your connection fails.

    Step 4: Use the “One-Way Safety Check”

    Before committing to a night stop, ask: if my phone battery dies or the train stops, can I still get back safely?

    If the answer depends on one fragile option, choose a different route or finish earlier. This simple test is more useful than generic advice like “be careful.”

    Step 5: Protect Your Phone Battery

    At night, your phone does more work. You may use maps, translation, tickets, camera, transport apps, and ride-hailing.

    Battery Plan

    • Leave the hotel with at least 70% battery when possible.
    • Carry a small power bank.
    • Download offline maps.
    • Save your hotel address.
    • Lower screen brightness when you do not need it.
    • Avoid filming long videos if your battery is low.

    Step 6: Dress for Temperature Changes

    A city that feels hot at sunset can turn cool near the water or after midnight. Carry one light layer if the forecast suggests a drop.

    Comfortable shoes matter even more at night because uneven streets, steps, and dim lighting can make poor footwear a problem.

    Step 7: Choose Well-Lit, Active Areas

    Night travel does not require staying only on the busiest tourist street, but avoid shortcuts through empty parks, unlit alleys, isolated beaches, or construction zones when you do not know the area.

    If locals are leaving an area and businesses are closing, treat that as useful information. You do not need to stay just because a map says the attraction is nearby.

    Step 8: Be Careful With Alcohol

    Night tourism can include bars, wine tastings, or nightlife. Keep your transport plan realistic if you drink.

    • Do not drive.
    • Keep control of your drink.
    • Know how you are getting home before drinking heavily.
    • Stay with your group in unfamiliar areas.
    • Avoid walking long distances alone when impaired.

    The goal is not to remove fun. It is to avoid turning a good night into a preventable problem.

    Night Markets: How to Enjoy Them Without Wasting Time

    Busy Asian night market with food stalls after dark
    Night markets work best when travelers first scan the stalls, compare queues, and then choose food instead of buying at the first counter.
    Night travel scene in Singapore showing an active evening destination
    Busy evening areas work best when dining, walking, and return transport are planned in one compact zone.

    Night markets can be one of the best ways to combine food, local shopping, and atmosphere. They can also be crowded and repetitive if you arrive without a plan.

    Smart Night-Market Strategy

    Walk one full loop before buying a large meal. You will see what is available, compare queues, and avoid filling up at the first stall. Carry small local currency where cards are not widely accepted.

    Look for stalls that cook food fresh and have steady customer turnover. Follow local food-safety guidance and avoid food that has been sitting unrefrigerated for long periods.

    Late-Opening Museums and Galleries

    Some museums offer late hours on specific evenings. This is a strong option because it moves an indoor activity away from the middle of the day and can free daylight for outdoor sightseeing.

    Check the official museum website instead of relying on an old travel article. Late openings may be seasonal or limited to one day per week.

    Why This Works Well

    A late museum visit is also easy for solo travelers. It is structured, well-lit, staffed, and usually close to transport.

    Stargazing: One of the Best Forms of Noctourism

    Dark sky stargazing landscape with stars at night
    Stargazing needs darker skies, safe access, suitable weather, and enough time for your eyes to adjust to low light.

    Stargazing is a strong 2026 travel interest, but it requires more planning than city sightseeing.

    Check These Conditions

    • Cloud cover
    • Moon phase
    • Light pollution
    • Road access
    • Temperature
    • Park or reserve rules

    If you are going to a remote dark-sky area, a guided tour can be safer than self-driving on unfamiliar rural roads late at night.

    Night Photography Without Carrying Too Much Gear

    You do not need professional equipment for useful night photos.

    With a Phone

    • Clean the lens before shooting.
    • Use night mode when available.
    • Hold the phone against a wall or railing for stability.
    • Avoid digital zoom.
    • Tap the brightest area to control exposure.

    With a Camera

    A small tripod can help, but check whether tripods are allowed. Some museums, rooftops, and crowded squares restrict them.

    Destination Example: Kyoto After Dark

    Kyoto is a good example of why night sightseeing can work. Famous areas can be extremely busy during the day, while evenings can feel calmer. Historic districts such as Gion require respectful behavior because they are living neighborhoods, not film sets.

    Use Kyoto City Official Travel Guide for current visitor guidance, rules, and seasonal information. Respect photography restrictions and private property.

    Destination Example: Singapore

    Singapore Marina Bay skyline at night for noctourism travel
    Singapore is well suited to planned night sightseeing because major waterfront areas stay active and public transport remains useful into the evening.
    Singapore waterfront skyline illuminated at night for noctourism planning
    Singapore is a practical night-travel example because many waterfront areas remain active and connected by public transport.

    Singapore is well suited to evening travel because public areas are well lit, transit is efficient, and many attractions operate into the evening. Waterfront walks and food centers can be more comfortable after the daytime heat drops.

    Use Visit Singapore for current attraction and event information.

    Practical Plan

    Spend midday at an indoor attraction, take a late-afternoon rest, then visit a hawker center followed by a waterfront walk. Check the last MRT timing before staying out late.

    Destination Example: Dubai

    Dubai skyline at night with illuminated city buildings
    Dubai is a practical example of using evening hours to avoid some daytime heat while keeping transport and dining options available.

    Dubai is another destination where evening planning can be useful, especially in warmer periods. Malls, dining areas, waterfront districts, and some attractions stay active late.

    Check Visit Dubai for current operating hours and seasonal events.

    Even when a city feels active at night, heat can remain high. Hydration and sun exposure during the day still matter.

    Destination Example: New York City

    New York offers museums, observation decks, Broadway, restaurants, and illuminated landmarks after dark. The challenge is not finding something to do; it is avoiding an overpacked night.

    Use the Metropolitan Transportation Authority for current subway service changes because late-night maintenance can alter routes.

    How Solo Travelers Can Plan Safer Night Sightseeing

    Solo travel does not mean you must return to the hotel at sunset. It does mean your backup plan matters more.

    Useful Solo Habits

    • Share your evening plan with someone you trust.
    • Keep your phone charged.
    • Use busy transport stops.
    • Do not advertise that you are carrying large amounts of cash.
    • Choose licensed transport.
    • Stay aware when using headphones.
    • Leave any situation that feels wrong without worrying about being polite.

    How Families Can Use Noctourism

    Families can benefit from evening sightseeing too, especially in hot climates. The key is sleep and transport.

    Do not plan a late night immediately before a 6 a.m. tour. Choose one or two special evenings during the trip and keep the next morning slower.

    Night markets, illuminated gardens, early-evening cruises, and cultural shows can be easier with children than midnight walking tours.

    Heat-Smart Day Planning

    Noctourism works best when it changes the whole day, not just the evening.

    A Practical Hot-Weather Schedule

    • 7:30 a.m.: Outdoor sightseeing
    • 11:30 a.m.: Lunch
    • 1:00 p.m.: Museum, mall, hotel rest, or indoor activity
    • 5:30 p.m.: Early dinner or sunset stop
    • 7:00 p.m.: Evening sightseeing
    • 10:00 p.m.: Return transport

    This reduces time in peak heat and gives your body a break.

    Common Noctourism Mistakes

    Assuming a Popular Area Is Safe at Every Hour

    Conditions can change late at night. Check current local advice and transport.

    Forgetting Last Entry

    An attraction may close at 10 p.m. but stop admitting visitors at 9 p.m.

    Using an Isolated Shortcut

    A ten-minute saving is not worth an uncomfortable route in an unfamiliar city.

    Overloading the Night

    Sunset, dinner, market, rooftop, museum, and a show in one evening is too much for most travelers.

    Ignoring Sleep

    Several late nights can damage the rest of your trip. Build recovery time into the next morning.

    Night Travel Checklist

    • Check opening and last-entry times.
    • Confirm the return route.
    • Charge your phone.
    • Download offline maps.
    • Save your hotel address.
    • Carry a small power bank.
    • Bring water where appropriate.
    • Choose a compact route.
    • Stay in active, well-lit areas.
    • Keep one backup transport option.

    A Simple Rule for Choosing a Night Activity

    Before adding an after-dark activity, check three things: value, logistics, and recovery. The activity should offer something you cannot get as easily during the day, such as cooler weather, a night market, a performance, or a better atmosphere. The return route should be simple and still operate when the activity ends. Finally, make sure the late finish will not damage the next morning. If an evening plan creates two complicated transfers, a very short sleep window, or a long walk through an unfamiliar quiet area, choose an earlier version or a different activity.

    Final Takeaway

    Noctourism can make a trip more comfortable and more memorable, but it works best as a planning method rather than a trend to follow blindly. Use night hours to avoid extreme heat, see a different side of a city, enjoy markets and culture, or spend time under dark skies.

    The practical rule is simple: plan your return before your evening begins. Keep the route compact, check official hours, protect your phone battery, and choose activities that genuinely improve the trip. When done well, after-dark travel does not replace daytime sightseeing. It gives you another way to experience the destination.

  • How to Plan a Shoulder-Season Europe Trip in 2026 Without Overpaying

    How to Plan a Shoulder-Season Europe Trip in 2026 Without Overpaying

    How to Plan a Shoulder-Season Europe Trip in 2026 Without Overpaying

    Europe is not automatically cheap outside summer, but shoulder season can give you a better balance of price, weather, and crowds. In 2026, more travelers are looking beyond peak July and August trips because popular cities are crowded, heat can be intense, and hotel rates can rise fast. Fall and spring can solve some of those problems, but only if you plan around local weather, school holidays, major events, and seasonal closures.

    This guide shows you how to build a shoulder-season Europe trip step by step. It is for travelers who want to save money without ending up in a destination when half the attractions are closed or the weather ruins the plan. You will learn how to choose dates, compare regions, book transport, pick hotels, pack, and create a flexible daily schedule.

    For official entry rules and destination information, always check the relevant national tourism office and government pages before travel. For EU travel basics, Your Europe is a useful starting point.

    What Counts as Shoulder Season in Europe?

    There is no single shoulder season for the whole continent. The best dates depend on where you are going.

    For many central and northern European cities, shoulder periods often fall in April to May and September to October. Mediterranean destinations may stay warm later into fall, while Alpine regions can enter a quiet gap between summer hiking and winter ski seasons. Islands can also have different ferry schedules and business hours outside peak months.

    Why This Matters

    If you simply choose “October” because a blog says it is shoulder season, you may still hit a festival weekend with high hotel prices. Or you may arrive at a coastal town where beach clubs, ferries, and seasonal restaurants have already reduced service.

    Think in terms of a destination-specific shoulder season, not a Europe-wide rule.

    Step 1: Pick the Experience Before the Destination

    Start by deciding what you want from the trip. This makes it easier to choose a region and month.

    • Museums and city walking: Copenhagen, Vienna, Paris, Madrid, Berlin, Prague, and similar cities can work well in cooler months.
    • Food and wine: Harvest periods in parts of Italy, Spain, France, and Portugal can add seasonal interest.
    • Coast and swimming: Aim for earlier fall or later spring in southern Europe rather than late October.
    • Hiking: Check trail, lift, and weather conditions carefully in mountain areas.
    • Christmas markets: These are not shoulder season in the usual sense. Demand can be very high in late November and December.

    A traveler who wants galleries, cafes, and architecture can accept a rainy day more easily than someone planning a beach holiday. That one decision should guide the rest of the trip.

    Step 2: Compare Three Date Windows, Not One

    Do not search flights for only one weekend. Compare at least three nearby windows. For example, if you want a fall trip, compare late September, early October, and late October.

    What to Compare

    • Round-trip airfare
    • Hotel rates for the same neighborhoods
    • Average daylight
    • Expected temperature and rain
    • Local holidays and school breaks
    • Major concerts, conferences, festivals, or sports events

    A flight that is $80 cheaper can be a bad deal if hotels are $70 more per night because of a major event.

    Step 3: Use a Total-Trip Price, Not a Flight-Only Price

    Cheap airfare is attractive, but it is only one part of the trip. Build a quick spreadsheet or note with these costs:

    • Flights
    • Airport transport
    • Accommodation
    • Intercity trains or buses
    • Attraction tickets
    • Travel insurance
    • Daily food estimate
    • Local transit
    • Baggage fees

    Then compare destinations using the total. A city with a slightly more expensive flight but cheaper hotels and better public transport may be the lower-cost trip overall.

    Real-World Example

    Imagine you are choosing between Paris and Vienna for five nights. Paris has a cheaper flight, but the central hotel you want costs much more. Vienna’s airfare is higher, yet the hotel and airport transfer are cheaper. Once you add the whole trip, Vienna may cost less. The correct decision is based on the total, not the first number you see in a flight search.

    Step 4: Check Local Calendars Before Booking Hotels

    This is one of the most overlooked travel steps. Search the official city calendar and the local convention or events calendar.

    Large trade fairs can fill hotels in cities such as Frankfurt, Milan, Barcelona, and Paris. Football matches can also raise demand in some areas. Fashion weeks, marathons, festivals, and school holidays can change prices quickly.

    A Simple Rule

    If hotel prices look unusually high for a shoulder-season date, do not assume the city is simply expensive. Check what is happening that week.

    Step 5: Choose a Base That Reduces Transport Waste

    A cheaper hotel far from the center is not always cheaper in practice. You may spend more on daily transport and lose one or two hours each day.

    Look for neighborhoods near a metro, tram, or main rail line. You do not need to stay beside the biggest landmark. You do need to be able to reach the places you care about without awkward transfers.

    Good Location Test

    Before booking, open a map and check the route from the hotel to three places you know you will visit. If every trip needs multiple changes or a long walk at night, reconsider the hotel.

    Step 6: Book Rail Based on the Country

    Europe does not have one universal rail system. Use official operators whenever possible.

    Examples include SNCF Connect in France, Trenitalia in Italy, Deutsche Bahn in Germany, and ÖBB in Austria.

    High-speed and long-distance fares may rise closer to departure. Regional trains often work differently. Read the fare rules before choosing the cheapest ticket because low fares can be non-refundable or tied to one departure.

    When a Rail Pass Makes Sense

    A rail pass can be useful for a trip with many long-distance journeys and a need for flexibility. It is not automatically the cheapest choice. Compare the pass price with point-to-point tickets for your actual route.

    Step 7: Use Open-Jaw Flights for Multi-City Trips

    If you plan to visit several cities, check whether you can fly into one city and home from another. This is often called an open-jaw itinerary.

    For example, you could fly into Rome, travel north by train, and fly home from Milan. That avoids spending time and money returning to Rome only to catch a flight.

    When It Helps Most

    Open-jaw flights are especially useful when your route moves in one clear direction. They are less useful when the arrival and departure airports have much higher fares than a standard return ticket. Compare both options.

    Step 8: Build a Weather-Proof Itinerary

    The main trade-off of shoulder season is weather. The solution is not to predict every rainy day. It is to create days that can be rearranged.
    Use the Indoor-Outdoor Pairing Method

    For each day, pair one outdoor activity with one indoor activity. For example:

    • Old-town walk + art museum
    • Market visit + palace tour
    • Park + food hall
    • River walk + historic church or gallery

    If rain arrives, reverse the order. You still get most of the day without losing prepaid tickets.

    Step 9: Pack for Layers, Not One Forecast

    Shoulder-season forecasts can swing. A morning may feel cold, midday can be warm in the sun, and evening may turn windy.

    Useful Packing List

    • Light waterproof jacket
    • One warm mid-layer
    • Comfortable water-resistant shoes
    • Compact umbrella
    • Light scarf
    • Quick-dry basics
    • Small day bag
    • Portable power bank

    Avoid packing several bulky coats. Layers give you more combinations with less luggage.

    Step 10: Check Daylight Before Planning Day Trips

    Fall daylight gets shorter as you move north. A scenic day trip that works easily in September may feel rushed in late October.

    Use sunrise and sunset times when building outdoor days. Start nature-focused trips earlier and keep museums or restaurants for the evening.

    How to Save on Food Without Eating Poorly

    Food is one of the easiest areas to control without making the trip worse.

    Use a Two-Level Meal Strategy

    Choose one meal each day where you spend more, then keep the other meals simple. A bakery breakfast, market lunch, or grocery-store picnic can balance a nicer dinner.

    In 2026, grocery-store tourism has also become a real travel trend. Visiting a local supermarket can be useful, not just cheap. You see regional snacks, drinks, produce, and everyday products that may never appear in tourist restaurants.
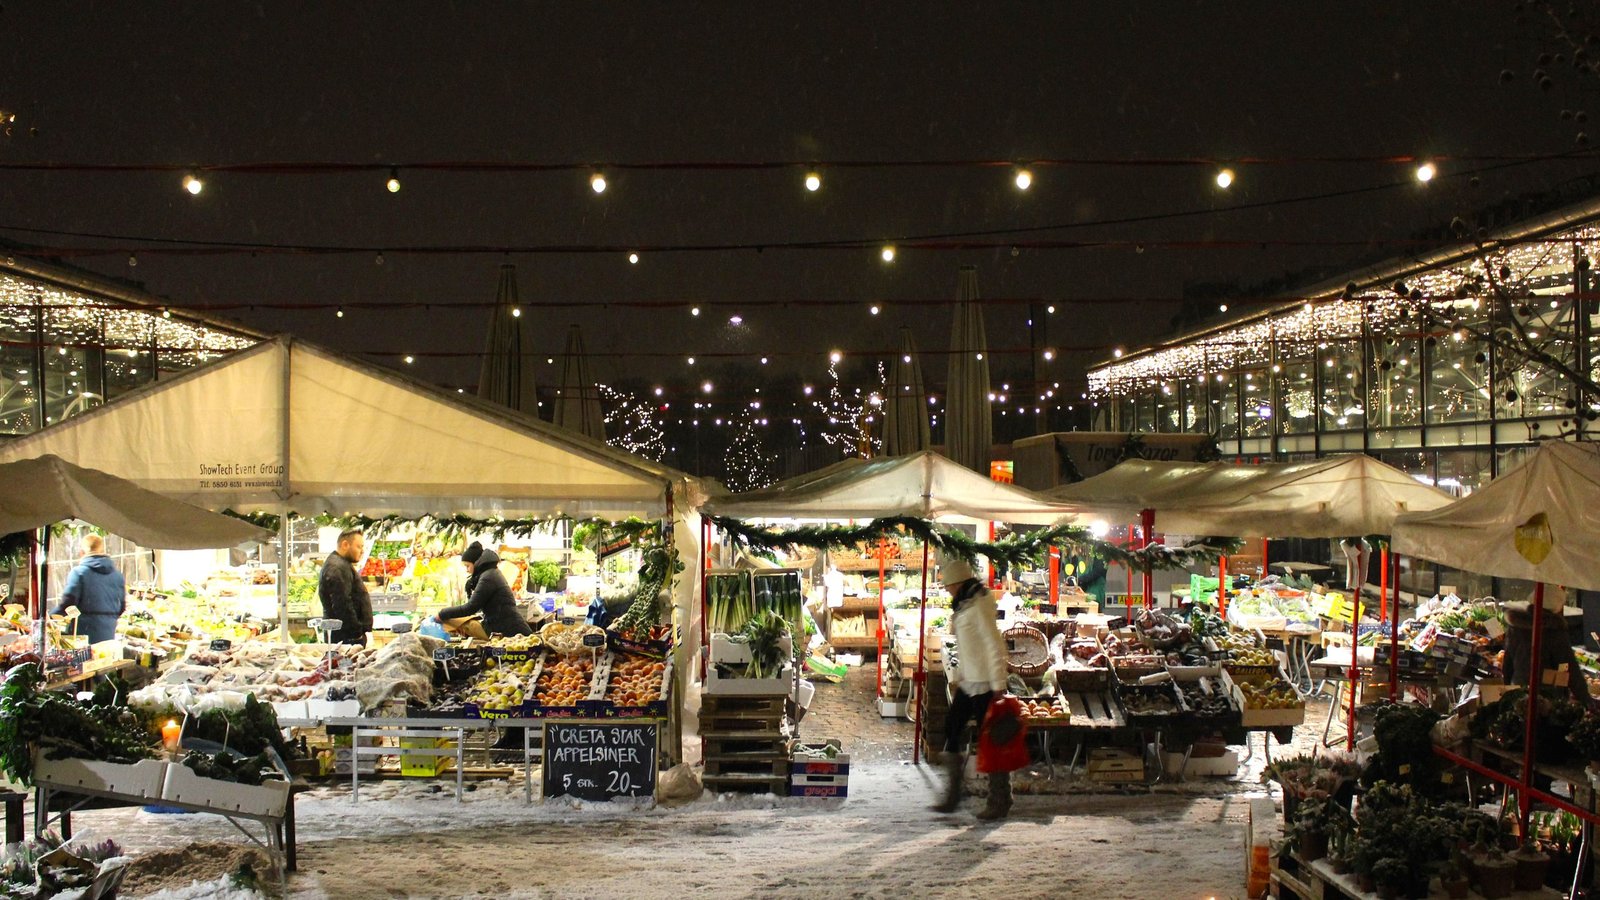
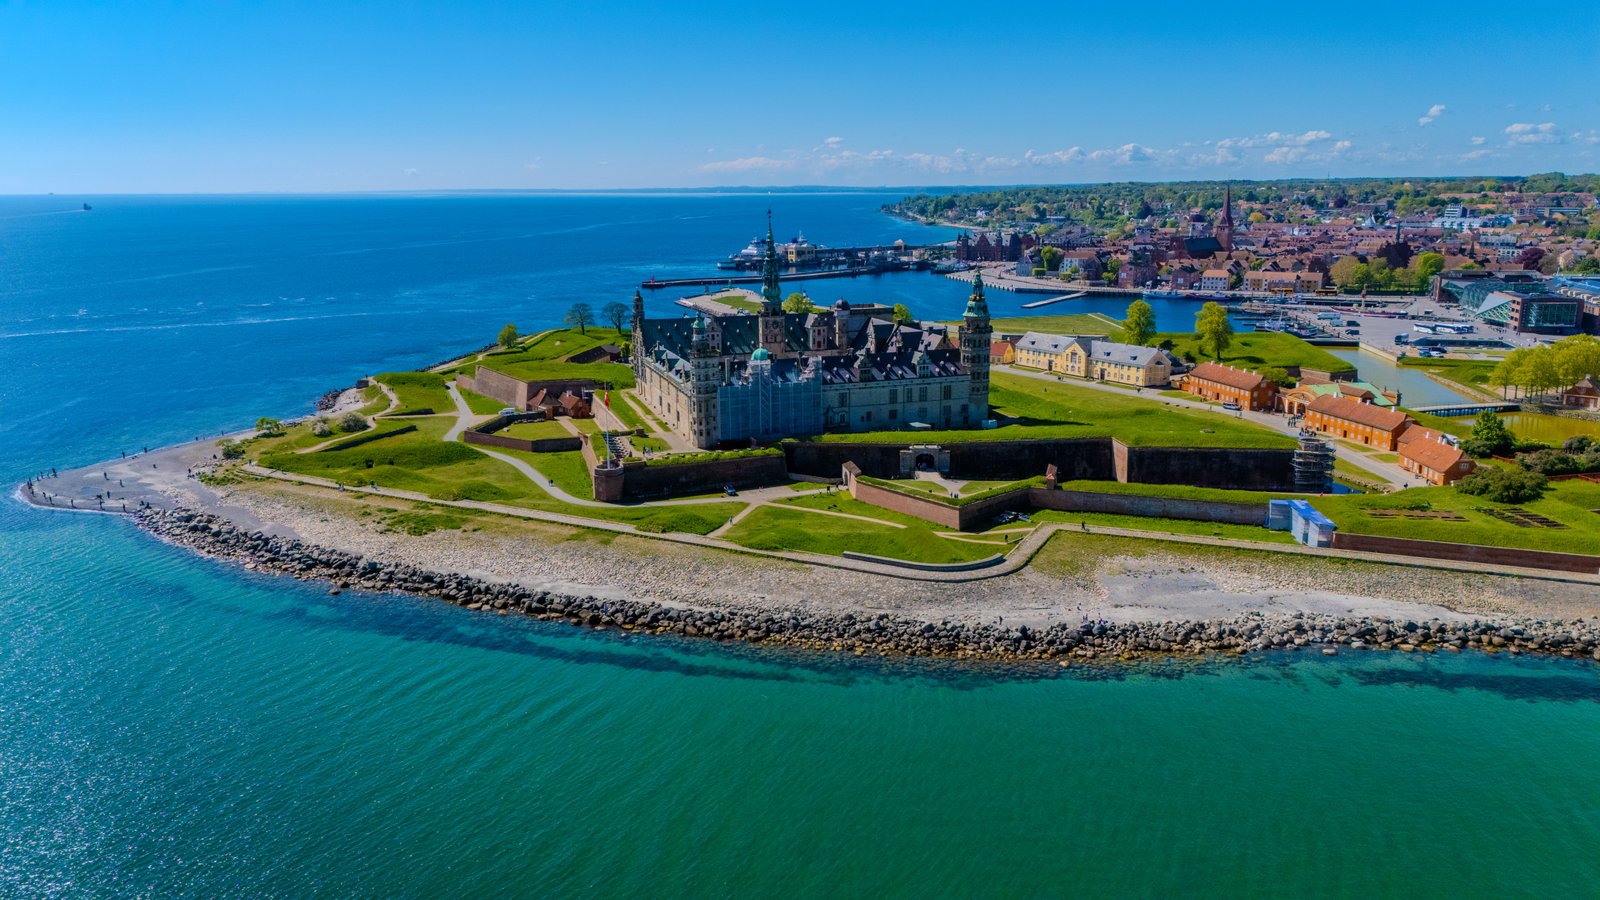
    Avoid Eating Beside the Main Landmark by Default

    Walk a few streets away and check menus before sitting down. Tourist zones are not always bad, but they often charge more for location.

    How to Avoid Shoulder-Season Closures

    City attractions usually operate year-round, but coastal towns, islands, and mountain destinations can reduce services.

    Check These Before Booking

    • Ferry frequency
    • Cable car or lift schedules
    • Seasonal hotels
    • Beach facilities
    • Mountain huts
    • Guided tours
    • Restaurant opening days

    Always check the official website for the specific attraction. Third-party listings can keep outdated hours.

    Travel Insurance Matters More When Plans Depend on Weather

    Insurance does not remove all risk, and not every policy covers the same situations. Read the policy before buying.

    Look at medical coverage, trip interruption, cancellation terms, baggage, and any exclusions that apply to activities such as hiking, skiing, or rental cars. Do not assume the cheapest policy offers the protection you need.

    Should You Prebook Attractions?

    Louisiana Museum of Modern Art on the Danish coast during a Europe trip
    Popular museums can stay busy outside summer, so prebook the few places that would be disappointing to miss while keeping the rest of the itinerary flexible.

    Prebook only the places where it clearly helps. Shoulder season can mean shorter lines, so you may not need a rigid schedule.

    Book Ahead When

    • The attraction has limited entry slots.
    • You are visiting on a weekend.
    • It is a famous site with year-round demand.
    • You need a specific guided tour.

    Stay Flexible When

    • Weather strongly affects the experience.
    • Tickets are widely available on the day.
    • You are unsure how much energy you will have.

    A 7-Day Shoulder-Season Europe Planning Template

    Here is a realistic structure for a one-week trip with two bases:

    • Day 1: Arrival, neighborhood walk, early dinner.
    • Day 2: Main city sights and one museum.
    • Day 3: Local neighborhood, food market, flexible attraction.
    • Day 4: Train to second city, easy evening.
    • Day 5: Major sights and one booked experience.
    • Day 6: Weather-dependent day trip.
    • Day 7: Free morning and departure.

    This format avoids moving hotels every night and keeps one day flexible for weather.

    Common Shoulder-Season Mistakes

    Booking Only for the Lowest Price

    A cheap date with poor transport, closures, or very short daylight may not be good value.

    Assuming Fewer Crowds Means No Crowds

    Major attractions in Paris, Rome, Amsterdam, and Barcelona can stay busy all year. Book essential sites if missing them would ruin the trip.

    Packing for Winter When You Need Layers

    Heavy luggage is annoying on trains and cobbled streets. Pack items you can combine.

    Changing Cities Too Often

    Every hotel change uses time. For a seven-day trip, two bases are often enough.

    Ignoring Local Events

    A conference or festival can erase the savings you expected from traveling off-peak.

    How Far Ahead Should You Book?

    There is no perfect number of months, but start tracking flights and hotels early enough to understand normal prices. If your dates include weekends, school breaks, or a major event, book sooner.

    For flexible travelers, price alerts can help. For travelers with fixed vacation dates, waiting for a dramatic last-minute discount can be risky because the best-located hotels may disappear first.

    Final Takeaway

    A good shoulder-season Europe trip is not simply a summer itinerary moved to October. The season changes daylight, weather, transport, and local opening hours. Plan around those realities and the trip can be calmer, more affordable, and more enjoyable.

    Start with the experience you want, compare several date windows, calculate total-trip cost, check events, stay near useful transport, and keep one or two days flexible. Use official rail and attraction websites for current information. Most importantly, leave enough time to enjoy the place rather than using lower crowds as an excuse to schedule even more.

    Shoulder-Season Europe Visual Examples

    Street scene in Nørrebro Copenhagen for neighborhood travel guide
    A walkable neighborhood can be a better shoulder-season base than a cheaper hotel that requires long daily transfers.
    Torvehallerne food market in Copenhagen Denmark
    Indoor markets are useful weather-proof stops and can also keep lunch costs lower than a full restaurant meal.
    Kronborg Castle in Helsingør on a Danish Riviera day trip
    Day trips still work in shoulder season, but shorter daylight makes early starts and realistic travel times more important.
    Louisiana Museum of Modern Art near Humlebæk Denmark coast
    Pairing an indoor museum with an outdoor walk keeps the itinerary useful even when rain or wind changes the day.
  • Rotorua New Zealand in 2026: A 4-Day Nature, Māori Culture and Wellness Itinerary

    Rotorua New Zealand in 2026: A 4-Day Nature, Māori Culture and Wellness Itinerary

    Rotorua New Zealand in 2026: A 4-Day Nature, Māori Culture and Wellness Itinerary

    Rotorua is one of those places where the landscape does most of the explaining. Steam rises from the ground. Lakes sit beside forest. Geothermal pools bubble a short drive from the city center. Māori culture is also central to the region, not a side attraction. In 2026, that combination feels especially relevant because travelers are spending more time on nature, wellness, and hands-on local experiences instead of rushing between photo stops.

    This four-day guide is designed for a first visit. It balances geothermal sites, Māori culture, forest, lakes, and a proper wellness break. It also explains where a car helps, when you can use shuttles, what to book ahead, and how to avoid turning the trip into an expensive list of attractions.

    Use RotoruaNZ for current regional information and Tourism New Zealand for wider travel guidance before your trip.

    Why Rotorua Is Worth Visiting in 2026

    Rotorua fits several travel trends that have grown stronger in 2026. Visitors are choosing outdoor experiences that feel active but not extreme. They also want cultural activities led by local communities and wellness experiences connected to the landscape. Rotorua naturally combines all three.

    You can spend the morning walking around geothermal vents, the afternoon learning about Māori traditions, and the evening soaking in mineral water. The next day can feel completely different, with redwood forest trails, lake views, and a relaxed dinner in town.

    Who Will Enjoy Rotorua Most?

    Rotorua works well for couples, families, solo travelers, and road trippers. It is especially good if you want more than a city break but do not want a difficult hiking holiday. Many of the best experiences are accessible with short walks, guided visits, or easy drives.

    How Long Should You Stay?

    Two nights is possible, but it forces you to choose between culture, geothermal areas, and nature. Four days gives you a better rhythm. You can see major highlights without booking morning-to-night activities.

    • Day 1: Arrive, lakefront, city walk, and geothermal introduction.
    • Day 2: Whakarewarewa or Te Puia, Māori culture, and an evening soak.
    • Day 3: Redwoods, lakes, and outdoor activities.
    • Day 4: Wai-O-Tapu or Waimangu, slow lunch, and departure.

    Day 1: Start Slowly and Learn the Landscape

    Walk the Rotorua Lakefront

    After check-in, begin with the lakefront rather than heading straight to a paid attraction. This gives you time to adjust after travel and understand the city layout. The water, birdlife, and distant hills make an easy first impression.

    Keep the first afternoon flexible. Rotorua has a strong sulfur smell in some areas because of geothermal activity. Most travelers get used to it quickly, but it is better to start gently instead of packing the first day with several tours.

    Explore Kuirau Park

    Kuirau Park is a useful free introduction to Rotorua’s geothermal character. You can see steaming areas and hot pools without committing several hours or a large ticket cost. Stay on marked paths and respect all barriers. Geothermal ground can be dangerous even when it looks solid.

    Have an Early Dinner

    If you traveled from Auckland or arrived after a long flight, choose an early dinner and rest. Saving energy for the next three days is more useful than forcing another attraction into the evening.

    Day 2: Māori Culture and Geothermal Rotorua

    Pohutu Geyser and geothermal landscape at Te Puia Rotorua
    Rotorua’s geothermal and Māori cultural experiences are best approached with enough time for context, not as a quick photo stop.

    Choose One Main Cultural-Geothermal Experience

    Two of the best-known options are Te Puia and Whakarewarewa – The Living Māori Village. They are different experiences, so read current tour descriptions before booking.

    Te Puia combines geothermal features, the Pōhutu Geyser, arts, and cultural interpretation. Whakarewarewa focuses on a living village and the relationship between local Māori life and the geothermal environment. If your schedule is short, pick one rather than trying to rush through both.

    How to Approach a Cultural Visit Respectfully

    Arrive on time, listen carefully to guides, and treat performances as cultural experiences rather than just entertainment. Ask before taking close photos of people when the rules are not clear. Use the names and explanations provided by local hosts rather than relying on simplified social-media summaries.

    A good guided experience should leave you with more context about people, land, language, and history—not only a collection of photos.

    Book a Geothermal Wellness Session for the Evening

    Rotorua is known for hot pools and spa experiences. Polynesian Spa is one established option near Lake Rotorua. Check the current pool types, age rules, and reservation requirements.

    An evening soak works well after a full day because it requires little planning. Keep hydrated, follow posted time limits, and avoid combining long hot-pool sessions with heavy alcohol use.

    Day 3: Redwoods, Lakes and Soft Adventure

    Redwoods Whakarewarewa Forest in Rotorua New Zealand
    The Redwoods give Rotorua a completely different landscape from its geothermal areas and work well for an easy nature-focused day.

    Walk in Whakarewarewa Forest

    The Redwoods – Whakarewarewa Forest is one of Rotorua’s easiest nature highlights to fit into a trip. There are walking and mountain-bike options for different ability levels. You do not need to be a serious hiker to enjoy the forest.

    Choose a trail based on time and fitness, not on what looks most impressive online. A comfortable 60- to 90-minute walk can be more enjoyable than a long route that leaves you exhausted for the rest of the day.

    Try the Treewalk if It Suits Your Budget

    The Redwoods Treewalk gives a different view of the forest from elevated walkways. Day and night experiences feel different, so compare schedules before booking. If you already plan a paid evening activity, a free ground-level forest walk may be enough.

    Spend the Afternoon Around the Lakes

    Lake Tikitapu Blue Lake near Rotorua New Zealand
    Lake Tikitapu is a practical scenic stop for travelers who want a slower afternoon around Rotorua’s lake district.

    Rotorua is surrounded by lakes, and this is where having a car becomes useful. Lake Tikitapu, also known as Blue Lake, is an easy option for scenic time and short walks. Lake Tarawera offers a more dramatic landscape and can be paired with guided activities.

    Do not try to visit every lake in one afternoon. Choose one area and stay long enough to enjoy it. Driving from viewpoint to viewpoint can make a nature day feel surprisingly tiring.

    Add One Soft-Adventure Activity

    Kayaking, an easy bike ride, a guided forest experience, or a lake cruise can add variety without turning the day into an endurance challenge. This “soft adventure” style fits many travelers because it combines activity with comfort.

    For example, a couple could walk in the Redwoods in the morning, take a relaxed lunch in Rotorua, then join a late-afternoon lake activity. That leaves enough energy for dinner and avoids a day packed with timed tickets.

    Day 4: See a Larger Geothermal Valley

    Option 1: Wai-O-Tapu

    Wai-O-Tapu Thermal Wonderland is known for colorful geothermal features and marked walking routes. It is outside central Rotorua, so check transport before you go.

    Option 2: Waimangu Volcanic Valley

    Waimangu Volcanic Valley near Rotorua New Zealand
    Waimangu offers a broader volcanic landscape and walking experience beyond central Rotorua.

    Waimangu Volcanic Valley offers a broader volcanic landscape and walking routes through a geothermal environment shaped by the 1886 Mount Tarawera eruption. It can feel more like a nature walk than a compact attraction.

    If you have already seen many geysers and hot pools on Day 2, Waimangu may give your itinerary more variety. If you want vivid geothermal colors and a shorter structured visit, Wai-O-Tapu may suit you better.

    Do You Need a Car in Rotorua?

    You can enjoy central Rotorua without a car, especially if your accommodation is near the lakefront and your booked experiences include transfers. A car becomes more valuable when you want to visit outer geothermal parks, lakes, and trail areas on your own schedule.

    When a Car Makes Sense

    • You are traveling as a couple or family and can share the rental cost.
    • You want to visit several places outside the city.
    • You prefer flexible start times.
    • You are continuing on a North Island road trip.

    When You Can Skip It

    • You are staying only two or three nights.
    • You prefer guided tours.
    • Your accommodation and main attractions offer transfers.
    • You do not want to drive on the left side of the road.

    If you rent a car, review New Zealand road rules before driving. The New Zealand Transport Agency is the right place to check official guidance.

    Where to Stay

    Central Rotorua

    Stay near the lakefront or central city if you want restaurants, shops, and some attractions within easy reach. This is a practical choice for visitors without a car.

    Near Whakarewarewa

    This area can be convenient if forest and geothermal experiences are your priority. Check the exact walking distance rather than relying only on a hotel description.

    Lake-Side Stays

    A lake-side lodge or holiday home can feel peaceful, but you may need a car for meals and attractions. This option is better for travelers who value space and quiet over central convenience.

    How to Budget for Rotorua

    Rotorua can become expensive because many headline experiences charge admission. The solution is to mix paid and free activities rather than cutting every good experience.

    A Balanced Daily Approach

    Plan one major paid attraction per day. Add free or low-cost activities around it, such as the lakefront, Kuirau Park, forest walks, scenic drives, or local markets when available.

    A family of four, for example, can save significantly by choosing one premium cultural experience, one spa or adventure activity, and then filling the rest of the trip with nature and self-guided stops. Buying five separate paid attractions each day rarely improves the trip enough to justify the cost.

    What to Pack

    • Comfortable walking shoes with good grip.
    • A light waterproof jacket.
    • Layers for changing weather.
    • Swimwear for hot pools or lake activities.
    • A refillable water bottle.
    • Sun protection, even on cooler days.
    • A small dry bag if you plan water activities.

    New Zealand weather can shift quickly. Layers are more useful than one heavy item.

    Responsible Travel Tips for Rotorua

    Stay on Marked Geothermal Paths

    Barriers are there for safety and environmental protection. Never step around them for a photo.

    Choose Locally Led Cultural Experiences

    When learning about Māori culture, prioritize experiences where local communities control the storytelling and benefit directly.

    Protect Lakes and Forests

    Follow local biosecurity and cleaning guidance for outdoor equipment. Do not move plants, rocks, or natural material between sites.

    Slow Down

    Responsible travel is not only about rules. Spending longer in one place can reduce unnecessary driving and usually creates a better experience.

    Common Rotorua Mistakes

    Booking Too Many Geothermal Parks

    After two or three major geothermal attractions, the experiences can start to blend together. Choose sites with different strengths.

    Leaving No Time for the Forest or Lakes

    Rotorua is more than geysers. The forest and lake landscape is a major part of the region.

    Ignoring Travel Time

    Places that look close on a map can still require driving, parking, check-in, and walking. Leave buffer time between bookings.

    Visiting Māori Culture as a Checklist Item

    Give a cultural experience enough time and attention. The value comes from context, conversation, and understanding, not only the performance or meal.

    Sample Plan for Different Travel Styles

    For Couples

    Combine a cultural-geothermal day, a spa evening, a forest walk, and one lake activity. Add one relaxed dinner rather than booking every night.

    For Families

    Keep driving days short. Mix a major attraction with outdoor time. Choose activities with clear age and height information before booking.

    For Solo Travelers

    Central accommodation can make logistics easier. Guided cultural or outdoor activities are also useful for meeting people without needing a full group tour.

    For Road Trippers

    Rotorua works well as a two- to four-night stop between Auckland, Taupō, and other North Island destinations. Avoid treating it as a quick lunch stop if you want to understand the region.

    Final Takeaway

    Rotorua is best when you do not reduce it to one geyser and one hot pool. The region becomes much more rewarding when you combine geothermal landscapes with Māori culture, redwood forest, lakes, and time to slow down.

    A four-day itinerary gives you enough room to choose experiences instead of collecting them. Plan one major activity each day, keep free nature time around it, and use local operators and official information for current conditions. That approach gives you a trip that feels active, cultural, and restorative without becoming overplanned.

  • Copenhagen and the Danish Riviera in Fall 2026: A Practical 5-Day Guide

    Copenhagen and the Danish Riviera in Fall 2026: A Practical 5-Day Guide

    Copenhagen and the Danish Riviera in Fall 2026: A Practical 5-Day Guide

    Copenhagen is easy to love in summer, but fall can be the smarter time to visit. The air is cooler, popular streets are less crowded, and the city feels more local. In 2026, travel interest is also moving toward shoulder-season trips, neighborhood food, coastal escapes, and slower itineraries. That makes Copenhagen and the Danish Riviera a strong combination for travelers who want culture, design, coast, and good food without trying to see everything in one day.

    This guide is built for a first-time visitor who has about five days. It focuses on a route that is simple to follow. You will see central Copenhagen, spend time in local neighborhoods, visit a major museum, and make a coastal day trip north. You will also get practical advice on trains, weather, daily costs, and how to avoid wasting time.

    For current visitor information, opening hours, and city updates, use Visit Copenhagen and VisitDenmark before you travel.

    Why Copenhagen Works Well in Fall 2026

    Fall suits Copenhagen because many of the city’s best experiences do not depend on hot weather. Museums, bakeries, design shops, food halls, historic streets, harbor walks, and cafes all work well when the temperature drops. You can still spend plenty of time outside, but you are not forced to build the whole trip around beaches or long sunny days.

    The season also fits a wider 2026 travel pattern: people are choosing cooler periods, calmer destinations, and trips that feel less rushed. Instead of racing through five famous sights before lunch, you can mix one major attraction with a neighborhood walk, a slow meal, and a short train ride.

    What the Weather Usually Means for Your Plans

    Expect changeable conditions. A clear morning can turn windy or wet by afternoon. The best strategy is not to fear the weather but to build flexible days. Pair an outdoor stop with an indoor one. For example, walk around Nyhavn and the harbor first, then keep a museum or food hall as your backup.

    Pack a waterproof outer layer, a light warm layer, comfortable shoes, and a compact umbrella. A small day bag with room for one extra layer is more useful than carrying a heavy coat all day.

    How Many Days Do You Need?

    Three days is enough for central Copenhagen. Five days is better if you want to add the coast without turning the trip into a checklist. The plan below gives you four city-focused days and one Danish Riviera day trip.

    • Day 1: Historic center, Nyhavn, harbor, and an easy first evening.
    • Day 2: Design, food, Nørrebro, and local city life.
    • Day 3: Museums, palace area, and waterfront time.
    • Day 4: Danish Riviera day trip with Helsingør and Humlebæk.
    • Day 5: Vesterbro, gardens, shopping, and a flexible final afternoon.

    Day 1: Learn Copenhagen on Foot

    Start at City Hall Square and Strøget

    Begin near Rådhuspladsen, or City Hall Square. From here, walk toward the old center. Strøget is famous as a shopping street, but the smaller side streets are often more interesting. Look for courtyards, independent stores, churches, and quiet lanes instead of staying on the main pedestrian route the whole time.

    If you land early in the morning, do not fill the day with timed tickets. Keep the first day simple. Jet lag, airport delays, and hotel check-in can easily change your schedule.

    Walk to Nyhavn Without Rushing

    Nyhavn is one of Copenhagen’s most photographed places. It is worth seeing, but you do not need to spend hours there. Walk the canal, take a few photos, and then continue toward the harbor. The waterfront paths give you a wider view of the city and help you understand how compact central Copenhagen is.

    For a quiet break, cross toward Christianshavn and walk beside the canals. You can return to the center by metro or on foot.

    Choose One Good Dinner, Not Three Famous Stops

    On the first evening, pick a restaurant near your hotel rather than crossing the city for a viral reservation. This keeps the day low stress. Copenhagen dining can be expensive, so a useful rule is to spend more on one meal and keep lunch simple with a bakery, market hall, or casual cafe.

    Day 2: Nørrebro, Bakeries, and Local Copenhagen

    Street scene in Nørrebro Copenhagen Denmark
    Nørrebro adds neighborhood life, independent shops, and cafes beyond Copenhagen’s historic center.

    Use the Metro, Then Walk

    Nørrebro is a good area for seeing everyday Copenhagen beyond the postcard center. Take the metro to save time, then walk through the neighborhood. Jægersborggade and nearby streets have cafes, small shops, and a relaxed local feel.

    Do not plan every food stop from social media. If a bakery has a long queue, walk two streets away. Copenhagen has many excellent bakeries, and the best travel decision is often the one that saves 40 minutes.

    Visit Torvehallerne for an Easy Lunch

    Torvehallerne food market in Copenhagen Denmark
    Torvehallerne is useful for a flexible lunch because travelers can choose from several Danish and international food stalls.

    Torvehallerne is useful for travelers because it gives you many food choices in one place. It works especially well if people in your group want different things. You can try open sandwiches, seafood, coffee, pastries, or simple produce-driven dishes without booking a long meal.

    Spend the Afternoon Around the Lakes

    Copenhagen’s lakes are ideal when you want a break from formal sightseeing. Walk part of the path, stop for coffee, and watch how locals use the city. This kind of low-cost activity is valuable on an expensive trip because it adds time and atmosphere without adding another ticket.

    Day 3: Culture Without Museum Fatigue

    Choose One Major Museum

    The mistake many visitors make is booking several museums back to back. Choose one major cultural stop and give it enough time. The National Gallery of Denmark is a strong option for art. Another choice is the Glyptotek, which combines art, archaeology, and an impressive indoor setting.

    Check opening days before you go. Museums often change hours by season, and some close on one weekday.

    Walk Through the Palace District

    After the museum, head toward the Amalienborg area. You do not need to tour every royal building. The open square, nearby church, and harbor views already give you a good sense of the area.

    If the weather is poor, replace a long waterfront walk with a cafe stop or another indoor attraction. A flexible itinerary is more useful than forcing every planned activity.

    Day 4: Danish Riviera Day Trip

    The coast north of Copenhagen is one of the best ways to add variety to a city trip. You get sea views, historic towns, and major cultural sites without renting a car.

    Morning: Helsingør and Kronborg Castle

    Kronborg Castle in Helsingor Denmark on a Danish Riviera day trip
    Kronborg Castle is the main historic anchor for a Copenhagen-to-Helsingør coastal day trip.

    Take a train from Copenhagen to Helsingør. The journey is straightforward, and the town is easy to explore on foot. The main landmark is Kronborg Castle, known internationally for its connection to Shakespeare’s Hamlet.

    Allow time for the castle, but also walk through Helsingør’s center. If the weather is good, the waterfront is worth adding before lunch.

    Afternoon: Louisiana Museum of Modern Art

    Louisiana Museum of Modern Art in Humlebaek Denmark
    Louisiana combines modern art, architecture, sculpture gardens, and coastal views in one stop.

    On the return route, stop in Humlebæk for the Louisiana Museum of Modern Art. The museum is famous not only for its exhibitions but also for its setting. The building, sculpture garden, and sea views make it feel very different from a standard city museum.

    This is a good example of why the Riviera works as a day trip: the train connects distinct experiences without complicated transfers. Check the museum’s current hours before leaving Copenhagen, especially in fall.

    Day 5: Vesterbro and a Flexible Final Day

    Explore Vesterbro in the Morning

    Vesterbro is close to the main station, so it works well on a final day. Walk around the Meatpacking District, browse cafes and shops, and keep the pace easy. If your flight leaves late, this area also lets you return to your luggage without crossing the whole city.

    Add Tivoli Only if It Fits Your Dates

    Tivoli Gardens operates on seasonal schedules. If it is open during your visit, it can be a fun final stop, especially in the evening. Do not assume it runs every day of the year. Check dates in advance.

    Keep Two Hours Unplanned

    This is one of the most useful travel habits. Leave the final afternoon partly open. You may want to revisit a bakery, buy gifts, walk somewhere you missed, or simply rest. An itinerary with no free space often feels efficient on paper and exhausting in real life.

    Where to Stay in Copenhagen

    Indre By for First-Time Visitors

    Stay in the center if you value walking and want major sights close by. You may pay more, but you can save time and reduce transport use.

    Vesterbro for Food and Transport

    Vesterbro is convenient for Copenhagen Central Station and has plenty of dining options. It is useful if you plan to make train day trips.

    Nørrebro for a More Local Feel

    Nørrebro works well for travelers who care more about neighborhood atmosphere than being beside the main attractions. The metro makes the center easy to reach.

    How to Get Around Without Overspending

    Copenhagen is walkable, but walking everywhere can waste time. Use a mix of walking and public transport. The metro is especially useful when weather changes or when you need to cross the city quickly.

    Check Public Transport Denmark for ticket and route information. If you plan many paid attractions and transit journeys, compare the cost of a city card with buying each item separately. Do the math for your own itinerary rather than assuming a pass always saves money.

    Simple Cost-Saving Example

    Imagine two travelers staying for five days. They choose a central hotel with breakfast, eat a casual lunch most days, pay for one good dinner, and use trains only when needed. That plan can be more economical than staying far outside the center and paying for repeated transport while losing an hour each day.

    What to Book Before You Arrive

    • Your hotel, especially for weekends and school-holiday periods.
    • One or two high-priority restaurants if they require reservations.
    • Timed museum or attraction tickets only when they clearly save time.
    • Train planning for the Riviera day, while keeping enough flexibility for weather.

    Avoid booking every hour. Fall weather is unpredictable, and a rigid schedule can become stressful.

    Common Copenhagen Planning Mistakes

    Trying to See Too Much in One Day

    Copenhagen looks small on a map, so travelers often stack too many stops. The distance may be short, but meals, museum lines, shopping, and photo breaks add time.

    Ignoring Wind and Rain

    A waterproof jacket is more useful than a stylish heavy coat that becomes uncomfortable indoors. Layers give you more control.

    Spending the Whole Trip in the Old Center

    The center is important, but neighborhoods and the coast add depth. Even one half-day outside the main tourist streets changes the feel of the trip.

    Assuming Every Famous Restaurant Is Necessary

    Copenhagen’s food scene is broad. You can eat well without building the trip around difficult reservations. Markets, bakeries, neighborhood restaurants, and casual Nordic cooking can be just as memorable.

    Who This Trip Is Best For

    This five-day route works well for couples, solo travelers, friends, and first-time visitors who enjoy food, museums, architecture, and easy train travel. It also suits travelers who prefer moderate days rather than early starts and late finishes.

    Families can use the same structure but may want fewer museums and more time at parks, Tivoli, or harbor areas. Travelers focused on nightlife can shift museum time later and keep evenings open.

    Final Takeaway

    Copenhagen in fall works best when you treat the city as more than a list of landmarks. Build each day around one main purpose, then add food, walking, and flexible time around it. Use the train network to reach the Danish Riviera, keep indoor alternatives ready for wet weather, and avoid filling every hour with reservations.

    A practical five-day trip might include the historic center, Nørrebro, one major museum, Helsingør, Louisiana Museum of Modern Art, and a relaxed final day in Vesterbro. That is enough variety to make the trip feel complete without turning your holiday into a race.